Table of Contents
How to Update a Customer Information
SimplaTask simplifies the way you create and manage customers, ensuring a fast and efficient process. This guide will show you how to update customer information quickly and easily, from beginning to end.
If you need help updating a customer, click here!
If you need help deleting a customer, click here!
If you need help importing customers, click here!
If you need help managing customer groups, click here!
Before You Start:
Before you begin, ensure the following requirements are met:
- Permissions: You need Manager, Admin, or Owner-level access to create invoices.
How to Access the Customer Dashboard
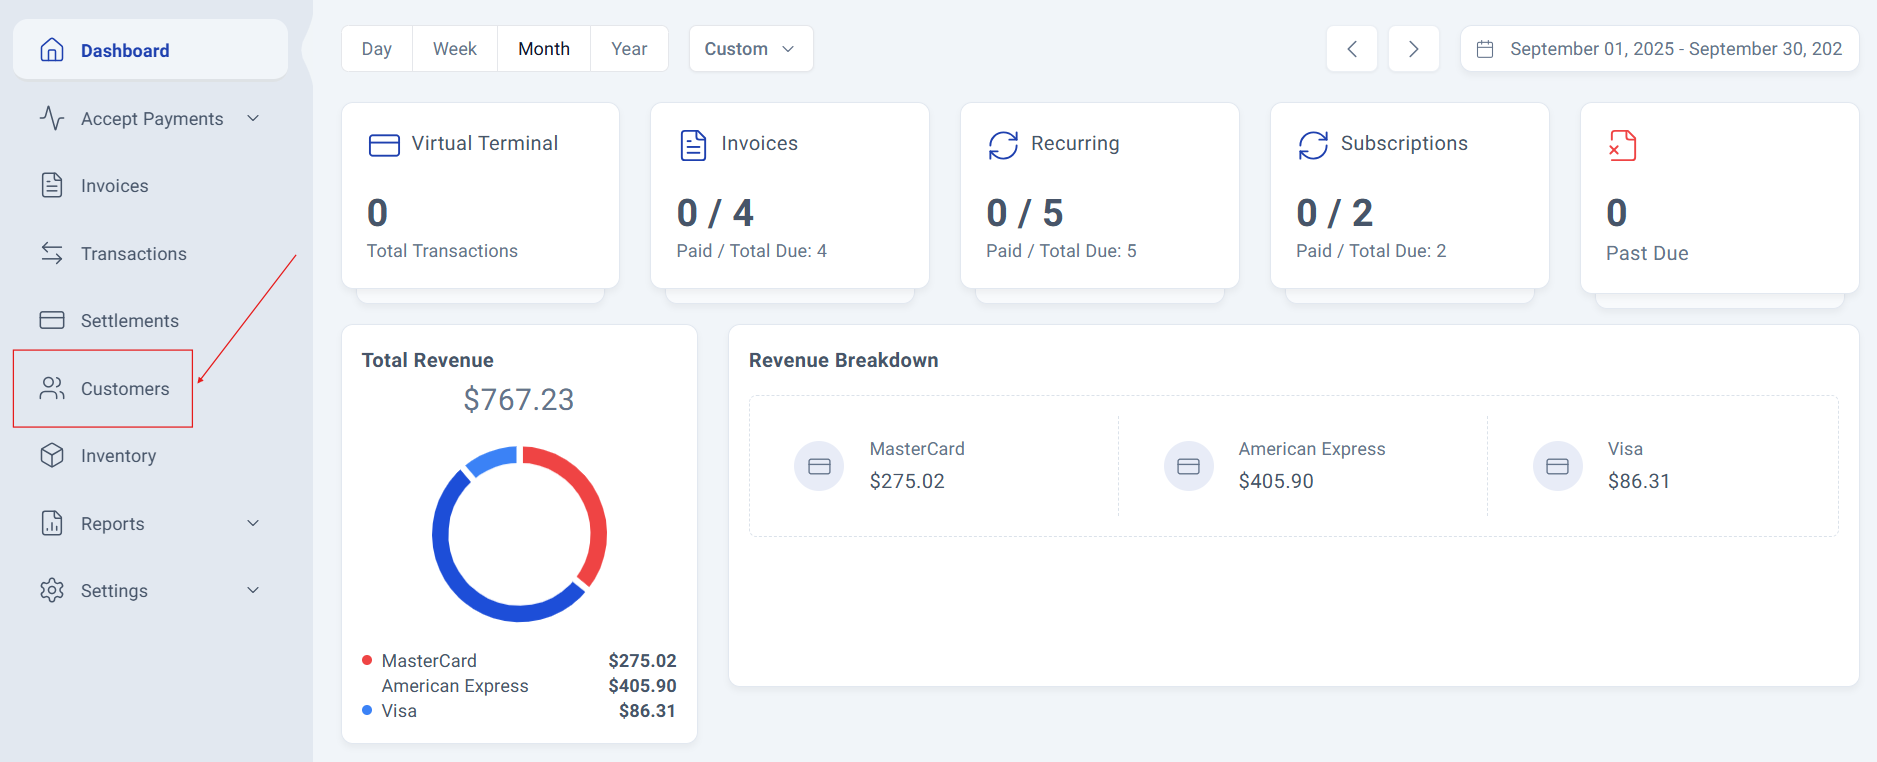
Step 1: Locate the customer section.
Navigate to your Customers section located on the left side of the main screen.
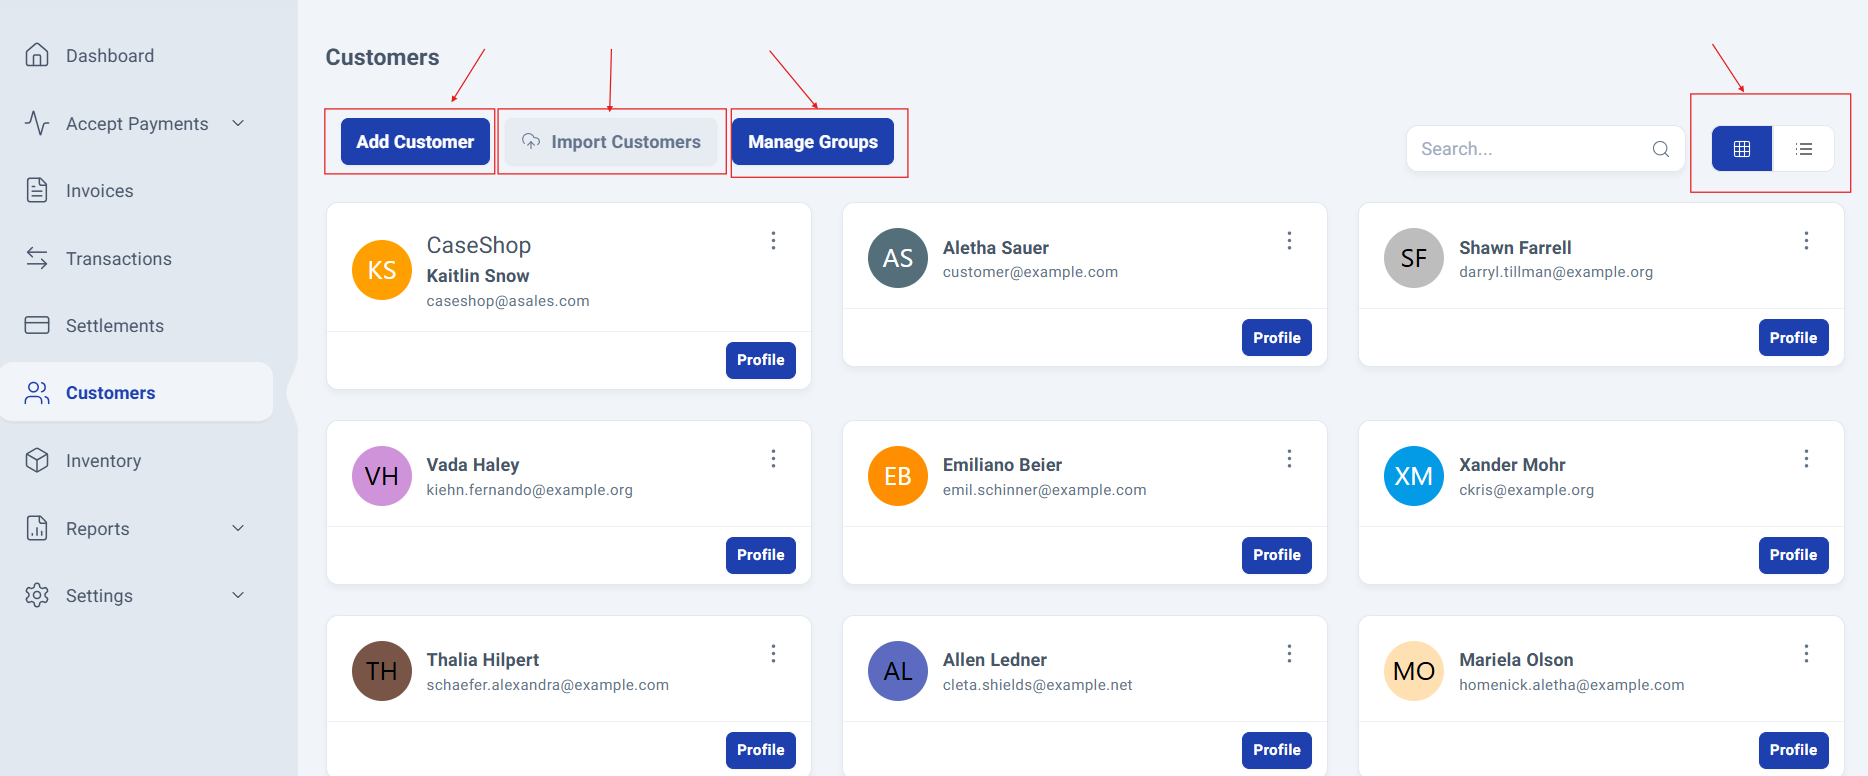
Step 2: Access the Customer Management Panel.
The Customer Management Panel will be displayed, giving you quick access to the following options:
Add Customer
Import Customers
Manage Groups
You’ll also see all previously added customers, with two available viewing modes: Grid (default) and List.
Customer Information Update Process
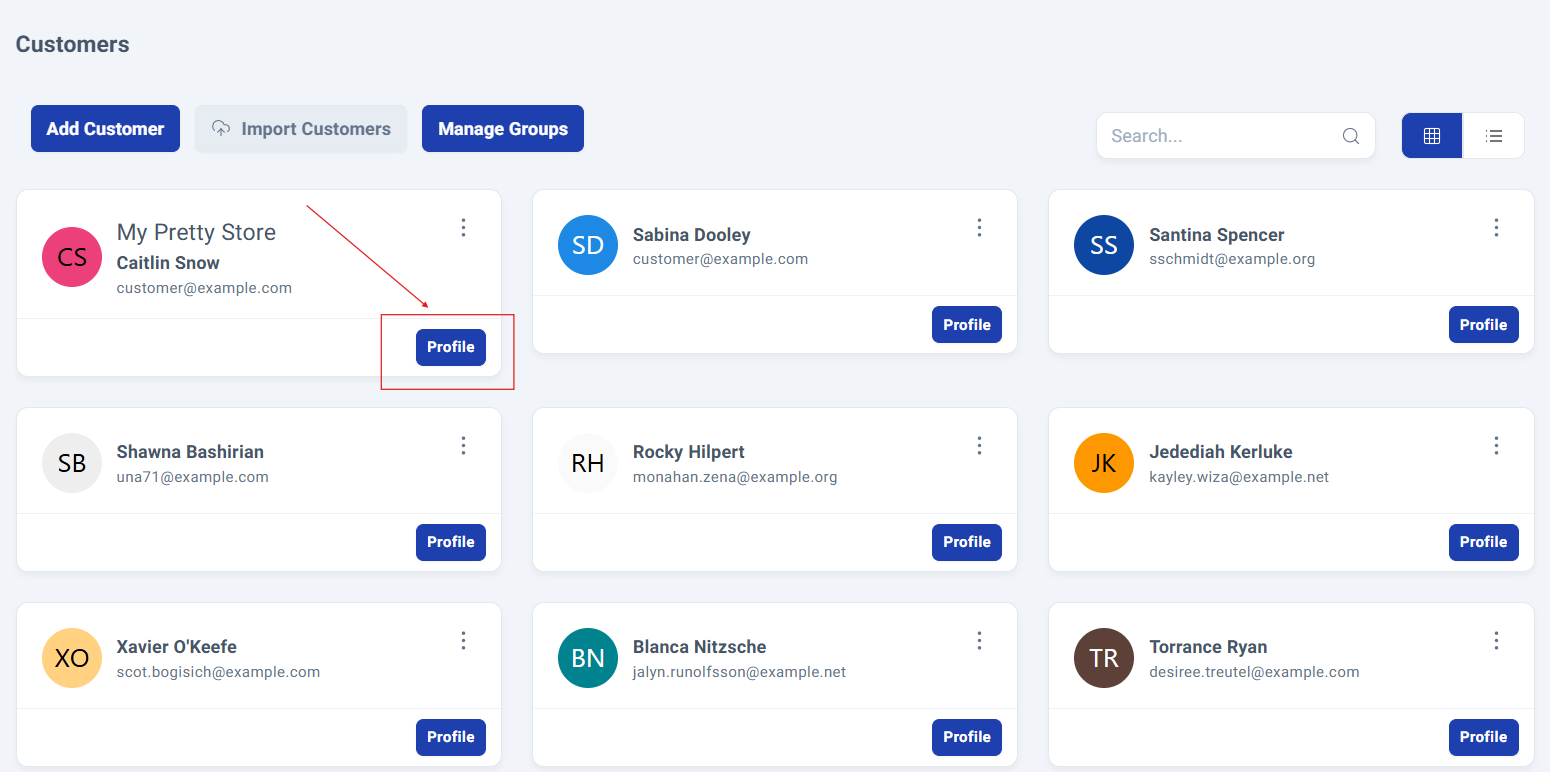
Step 3: Finding the Customer.
Locate the customer whose information you want to update and click the Profile button.
This opens the comprehensive customer panel displaying all their information: Summary, Account profile, Members, Invoices, Transactions and Wallet details.
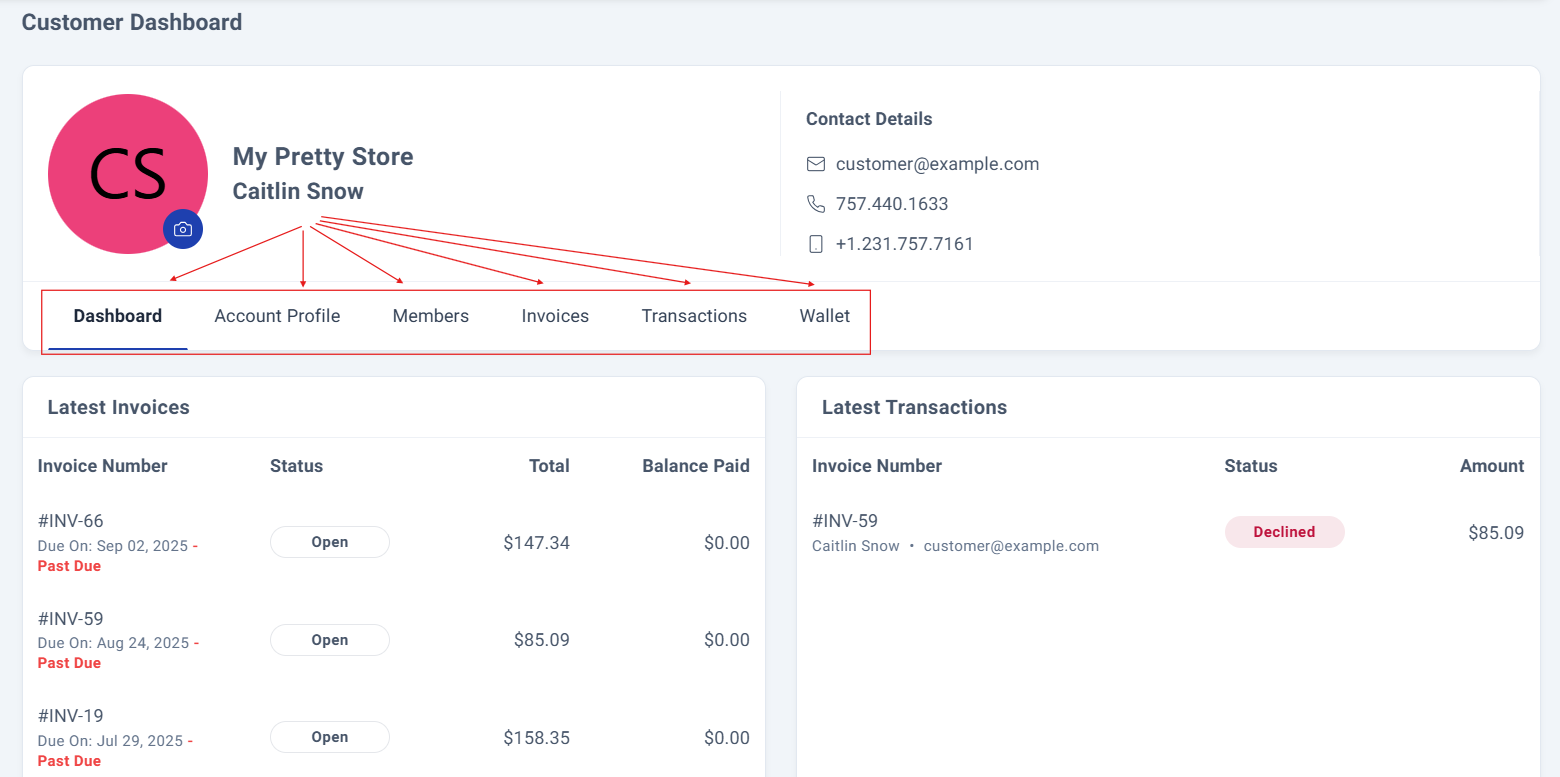
Step 4: Accessing the Editable Customer Data Form.
Select "Account Profile" to access the editable customer data form. Once you've finished updating the information, simply click Save to apply your changes.


Additional Sections for Enhanced Data Management.
Within the account profile, you'll find two additional sections for enhanced data management: Address information and Password updates.

Step 5: Address Information.
If the customer doesn't have an address on file, click "New Address" to open a dedicated screen where you can add a custom label for the address and either manually enter the address or select it directly from Google Maps integration. Existing addresses can be updated using the same streamlined process.


Step 6: Update Password.
The password update section provides two secure fields: One for the new password and another for confirmation. After entering the details, click Save to complete the password update.


Process Complete!
You have successfully updated a Customer.
Was this article helpful?
That’s Great!
Thank you for your feedback
Sorry! We couldn't be helpful
Thank you for your feedback
Feedback sent
We appreciate your effort and will try to fix the article