Table of Contents
How to Create a Customers
SimplaTask simplifies the way you create and manage customers, ensuring a fast and efficient process. This guide will show you how to set up a new customer quickly and easily, from beginning to end.
If you need help updating a customer, click here!
If you need help deleting a customer, click here!
If you need help importing customers, click here!
If you need help managing customer groups, click here!
Before You Start:
Before you begin, ensure the following requirements are met:
- Permissions: You need Manager, Admin, or Owner-level access to create invoices.
How to Access the Customer Creation Panel
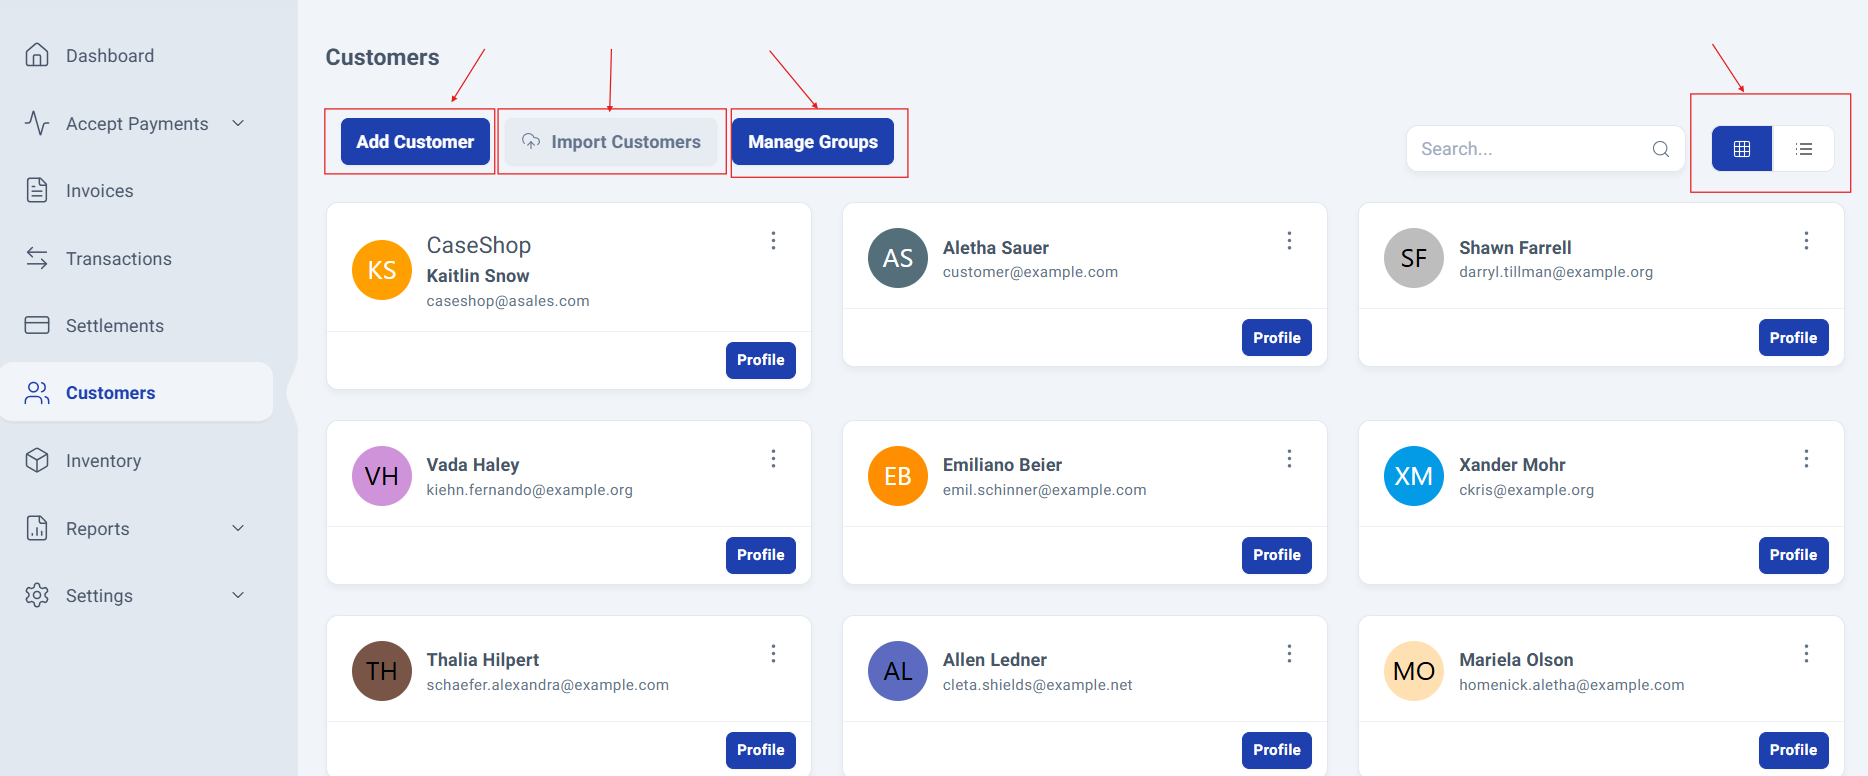
Step 1: Locate the customer section.
Navigate to your Customers section located on the left side of the main screen.

Step 2: Access the Customer Management Panel.
The Customer Management Panel will be displayed, giving you quick access to the following options:
Add Customer
Import Customers
Manage Groups
You’ll also see all previously added customers, with two available viewing modes: Grid (default) and List.
Customer Creation Process
Step 3: Open the Customer Form.
Click the "Add Customer" button to open the form and enter the customer details.

The form will slide out on the right side of the main screen, allowing you to start entering customer details right away.

Step 4: Complete the Customer Form.
Fill in all the required fields with the requested information. At the end of the form, you can choose to enable or disable the option that determines whether the customer will be visible on invoices.

Once you’ve reviewed the information, simply click the Save button at the bottom right of the form to store the customer details.

Customer Address Customization
Step 5: Add Customer Address.
In addition to the information entered in the form, you can also add a customer address. This option is located at the bottom of the form, just above the Save button. Click the Add button, found to the right of the word Addresses.

When you click, a new window will open asking you to enter a label and type in the address.

A Google Maps view will also appear to make locating the address easier.

Once completed, click the Add button, and the address will be successfully added to the customer’s record.
Final Review
Step 6: Showing the created Customer
Once this process is complete, you can go to the Customer Management Panel, where you’ll find the newly added customer.

Step 7: Searching Customers.
If you have a long list of customers, you can use the search bar located in the upper-right corner of the customer grid. Searches can be made by name or by email, making it quick and easy to find the customer you need.


Final Review
Step 6: Showing the created Customer
Once this process is complete, you can go to the Customer Management Panel, where you’ll find the newly added customer.
Another Way To Create A Customer
Step 7: Customer Selection in a Invoice
You can also create a new client directly from the invoicing section. If you're in the middle of creating an invoice and realize the client doesn't exist in your system yet, there's no need to interrupt your workflow. Simply click the "Create Client" button conveniently located on the right side of the main screen, as shown in the image.

Clicking this button opens a new window with a comprehensive form where you can enter all the new client's information, including the option to add their address details.

When you click the "Add" button, a window will open exactly as demonstrated in step 5 of this guide.

Step 8: Finishing the process.
Once you've completed all the required information, simply click "Save" and the new client will immediately appear in your selected clients list.


This streamlined approach allows you to continue your invoicing process efficiently without any interruptions, significantly speeding up your workflow and boosting your productivity.
Process Complete!
You have successfully created a new Customer.
Was this article helpful?
That’s Great!
Thank you for your feedback
Sorry! We couldn't be helpful
Thank you for your feedback
Feedback sent
We appreciate your effort and will try to fix the article