Table of Contents
How To View Invoice Details and Options
SimplaTask provides comprehensive invoice management with an intuitive control panel that gives you complete visibility into your billing operations. This step-by-step guide walks you through every feature, from dashboard overview to detailed invoice formats, ensuring you maximize the full potential of your invoice management system.
If you need help creating an One Time Invoice, click here!
If you need help creating a Recurring Invoice, click here!
If you need help creating a Subscription Invoice, click here!
If you need help creating an Installment Invoice, click here!
If you need help updating an Invoice, click here!
If you need help sharing an Invoice, click here!
Before You Start:
Before you begin, ensure the following requirements are met:
- Permissions: You need Manager, Admin, or Owner-level access to create payment links.
Accesing Your Invoice Dashboard:
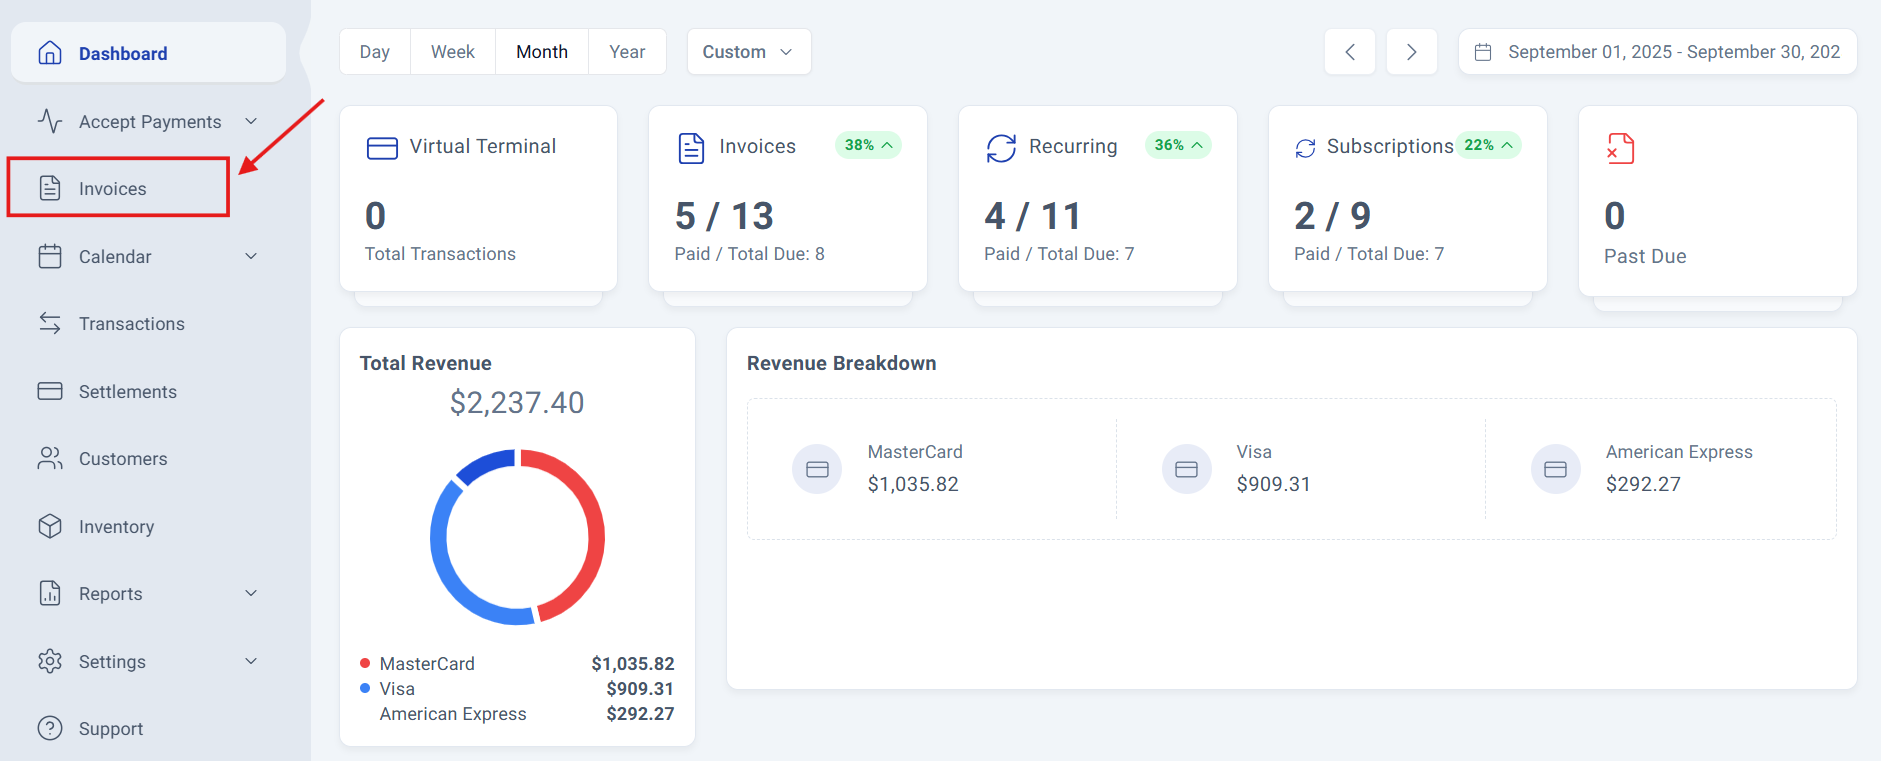
Step 1: Navigate to Invoice Dashboard.
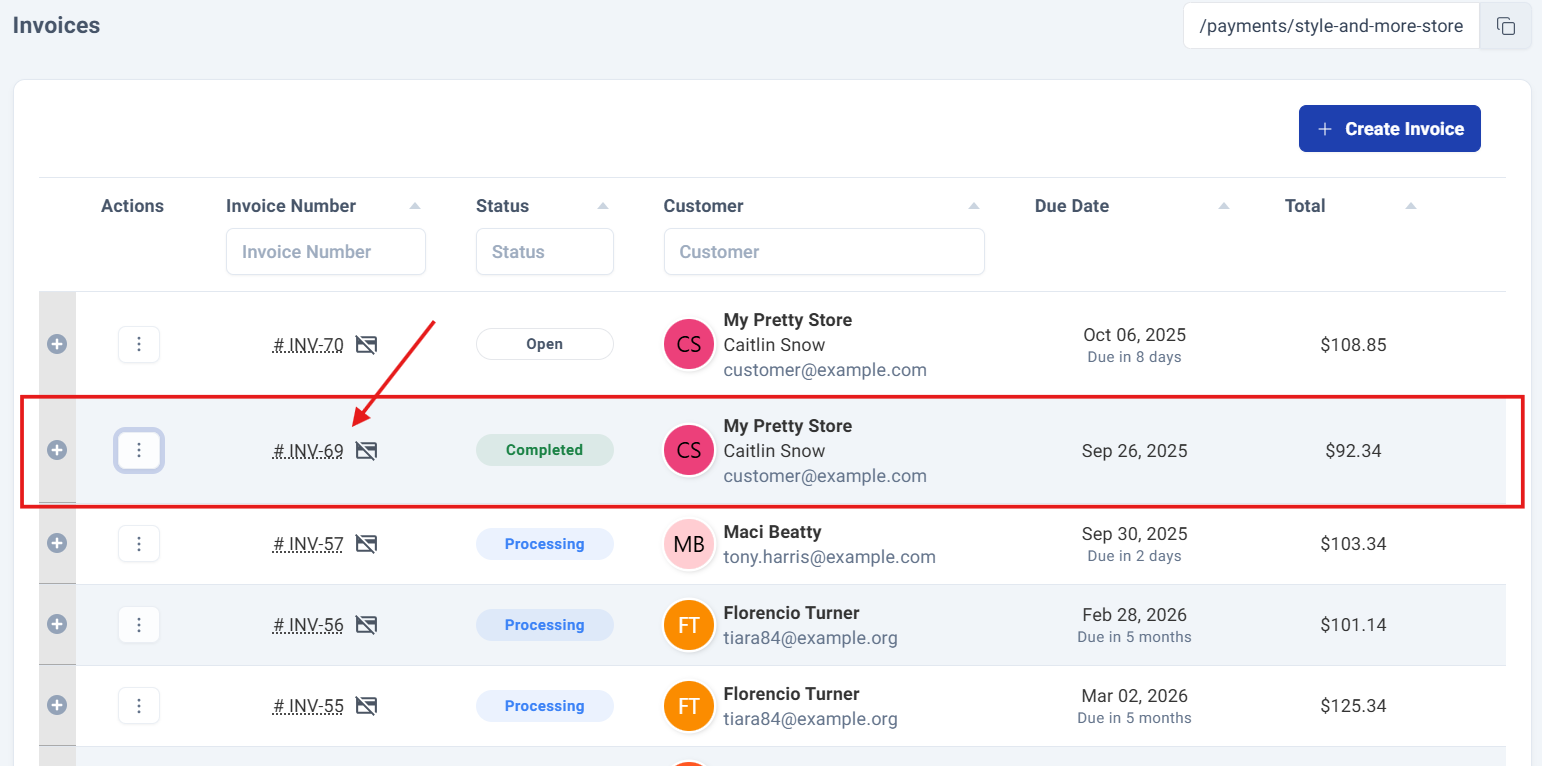
Navigate to your invoice section located on the left side of the main screen and click the "Invoices" option located in the third position of the menu, below "Accept Payments".
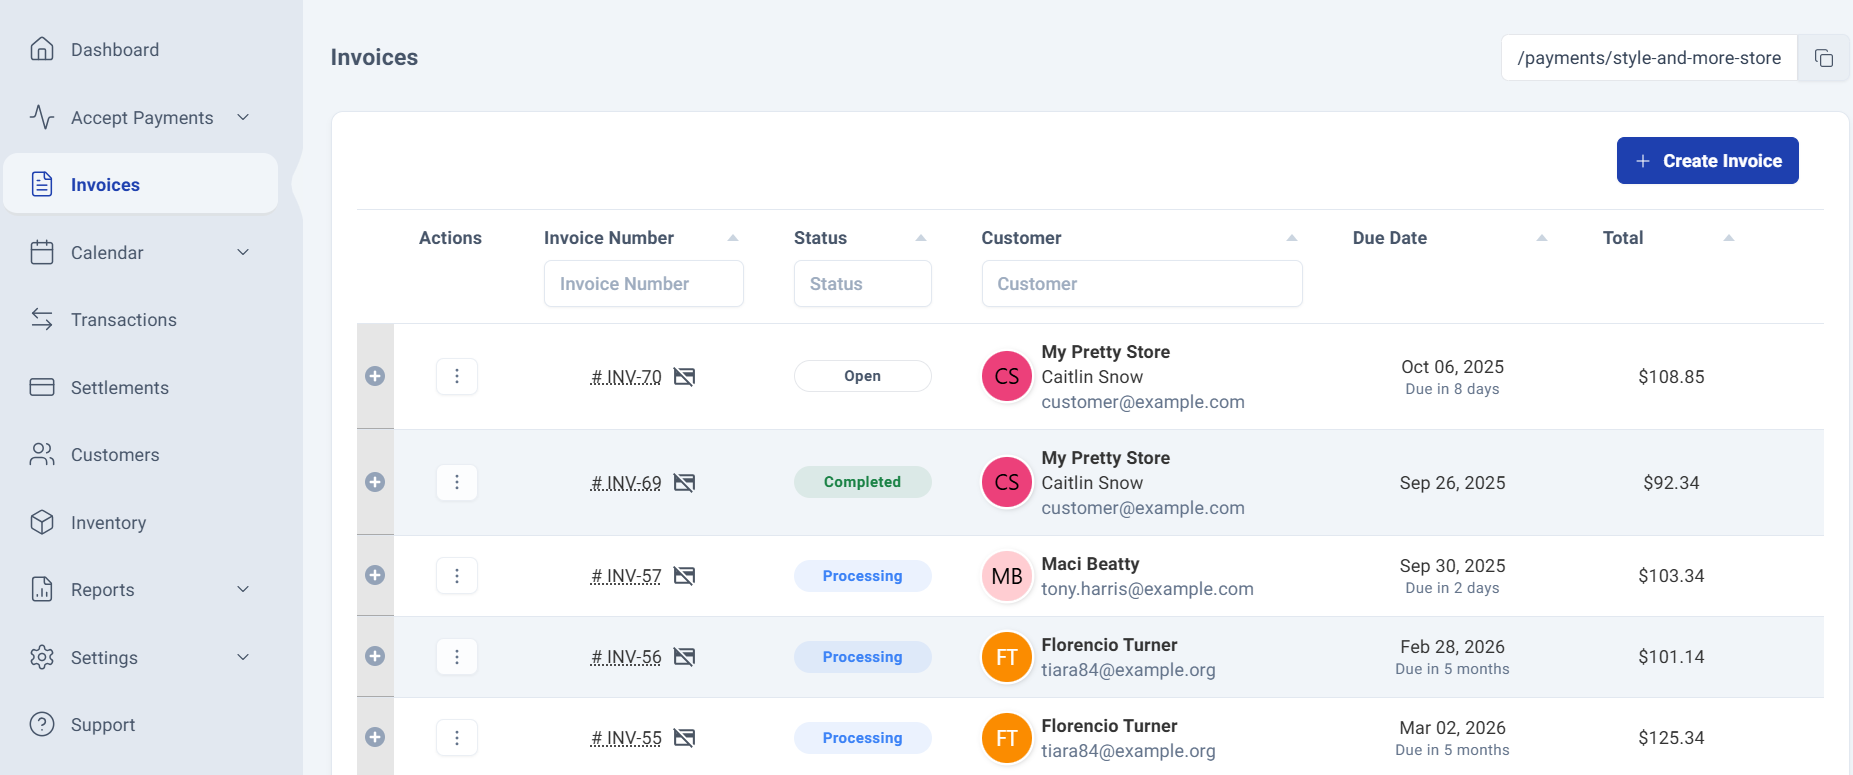
Step 2: The Invoices Dashboard.
The dashboard displays all your created invoices along with essential information for each one.
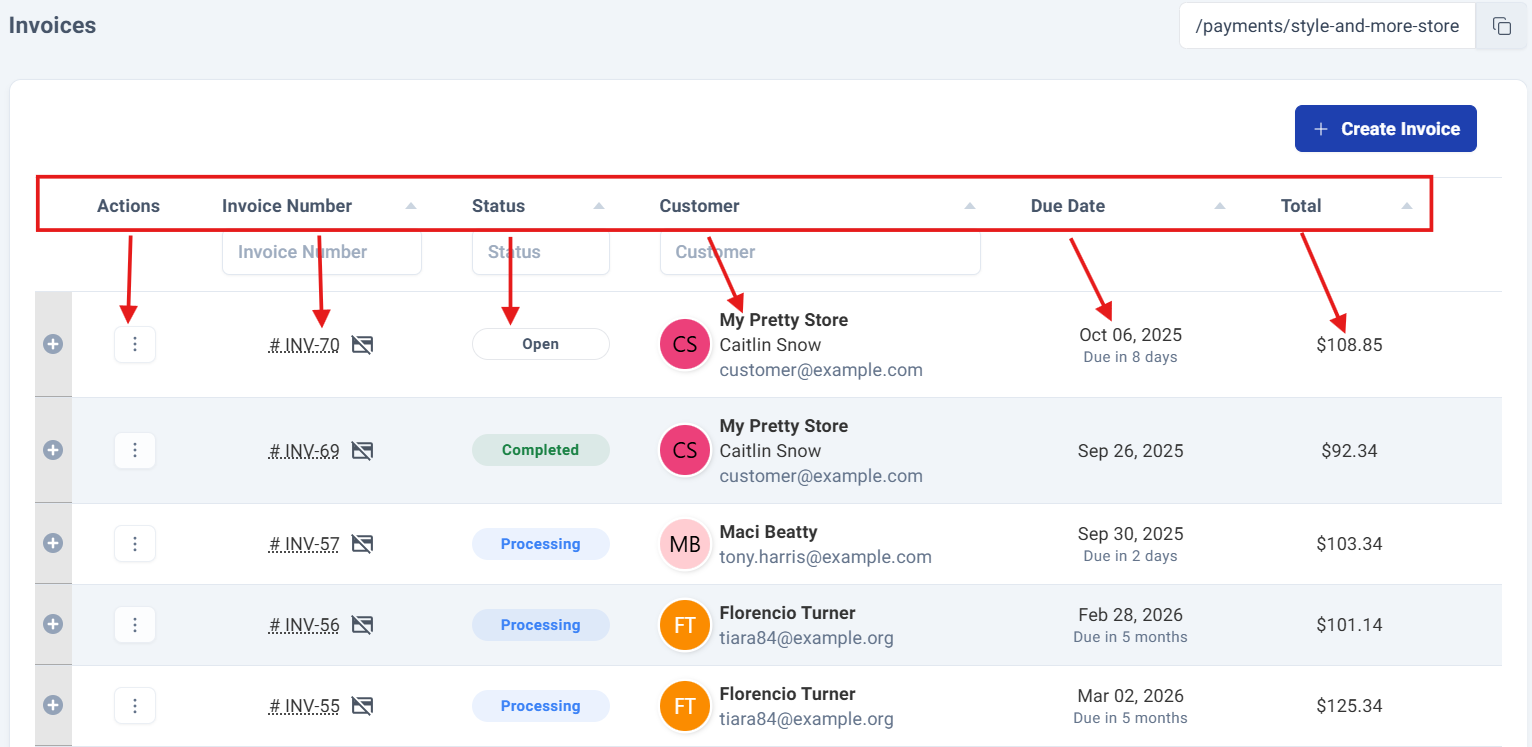
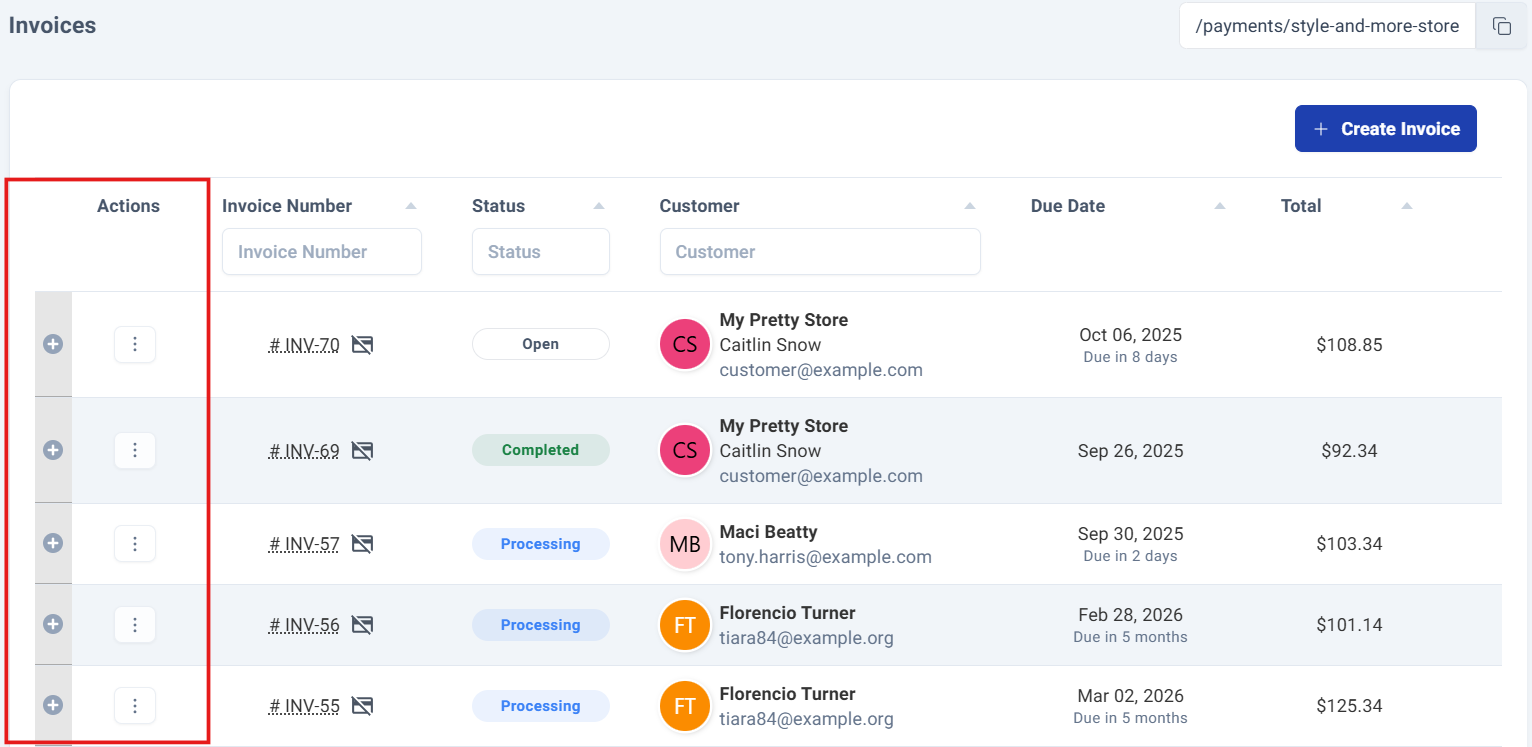
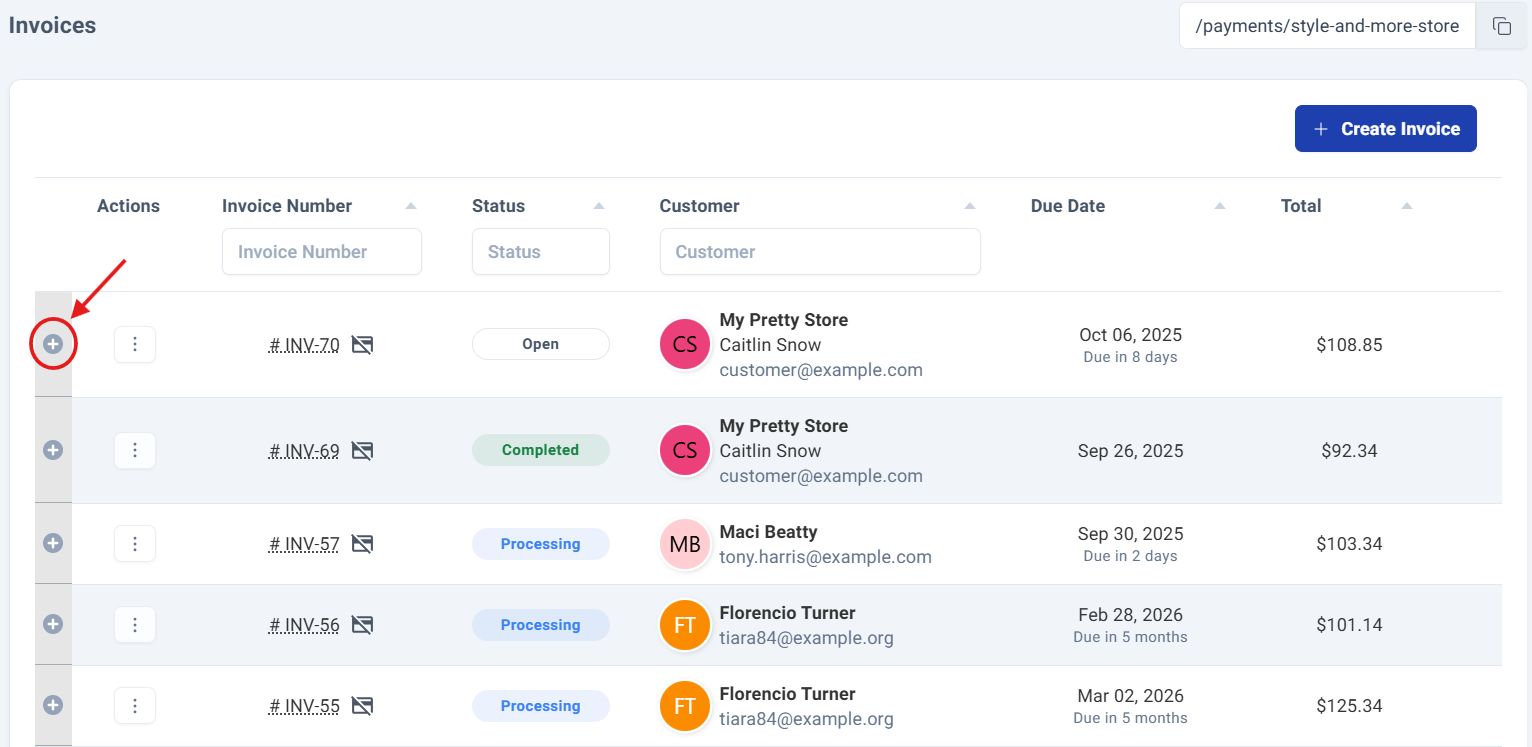
The first two columns provide quick-access options to perform various actions on your invoices.
Invoice Options:
Step 3: The Invoice Options.
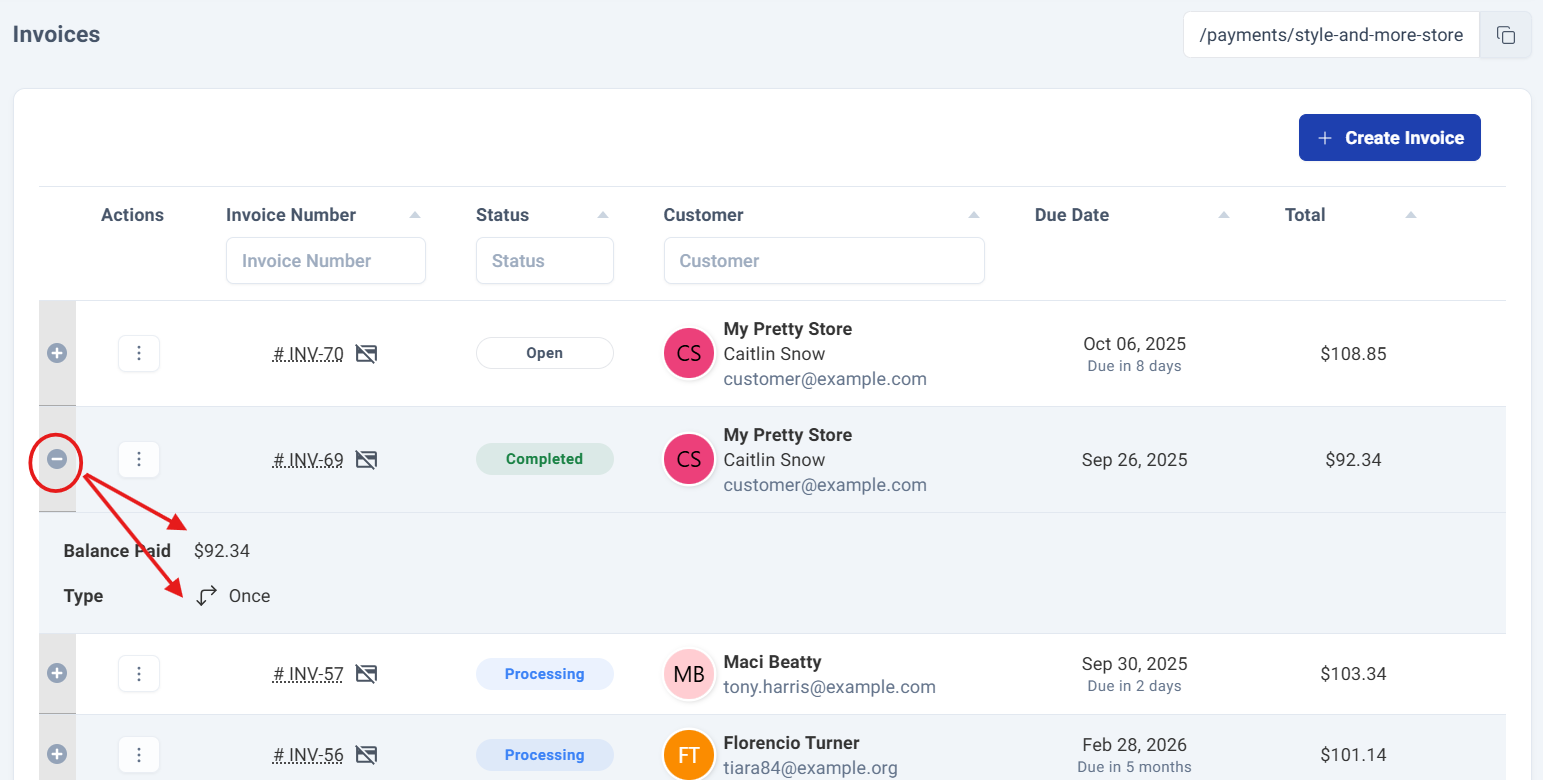
The circle with the X symbol reveals the balance paid and invoice type details for that specific invoice.
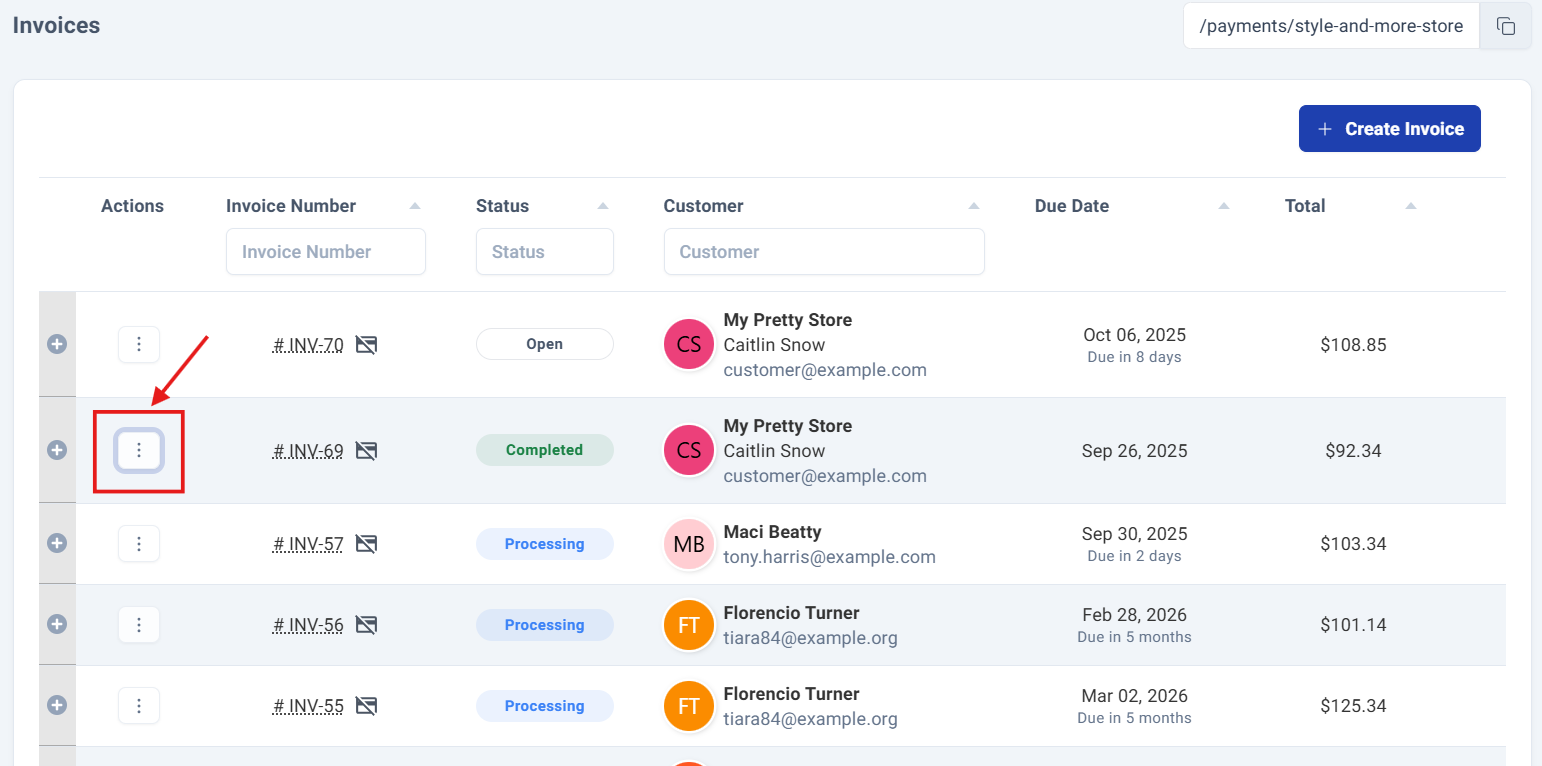
Finally, the three-dot menu button offers four key options when clicked: View, Send Mail, Send SMS and Edit the invoice.
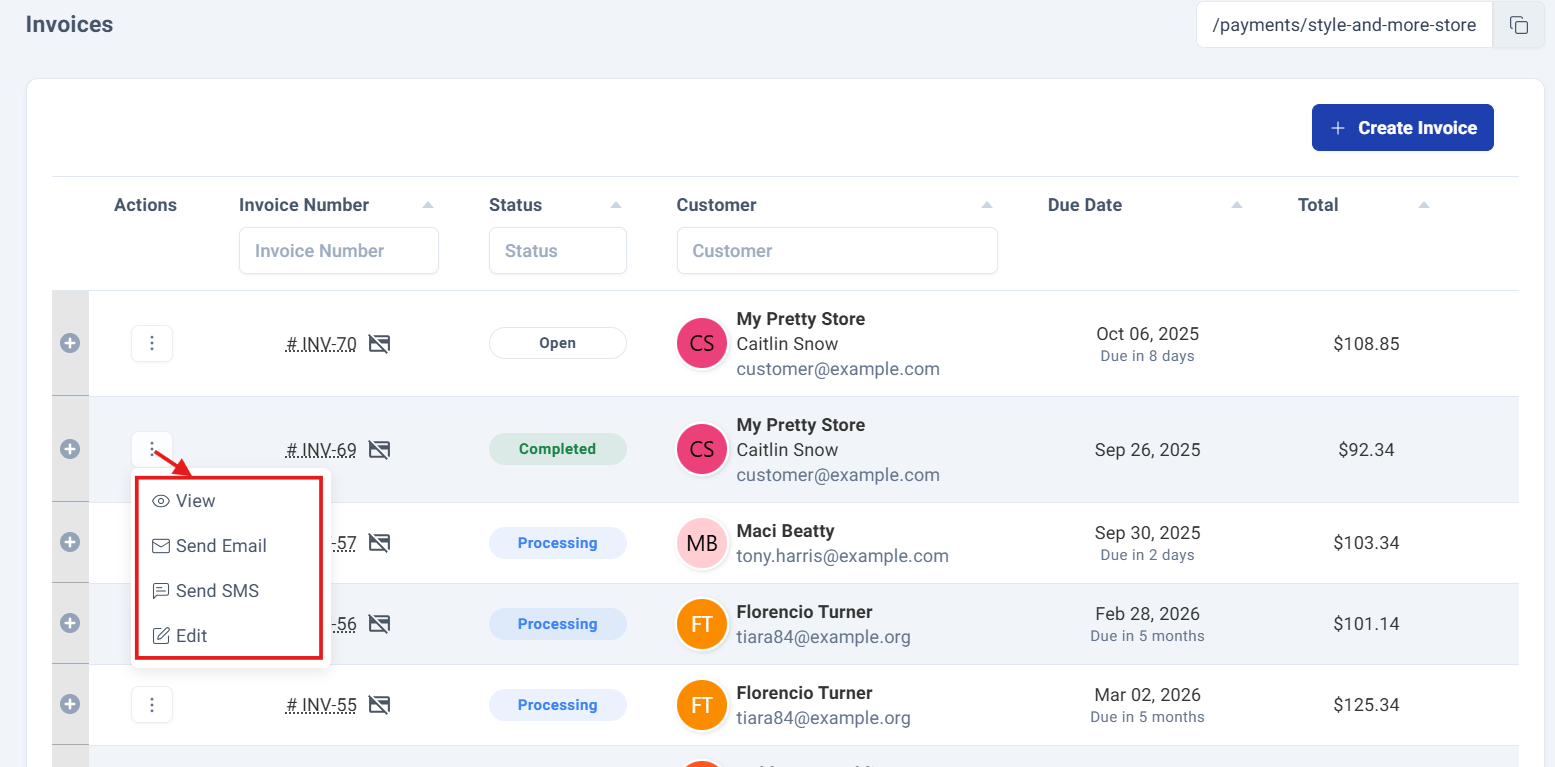
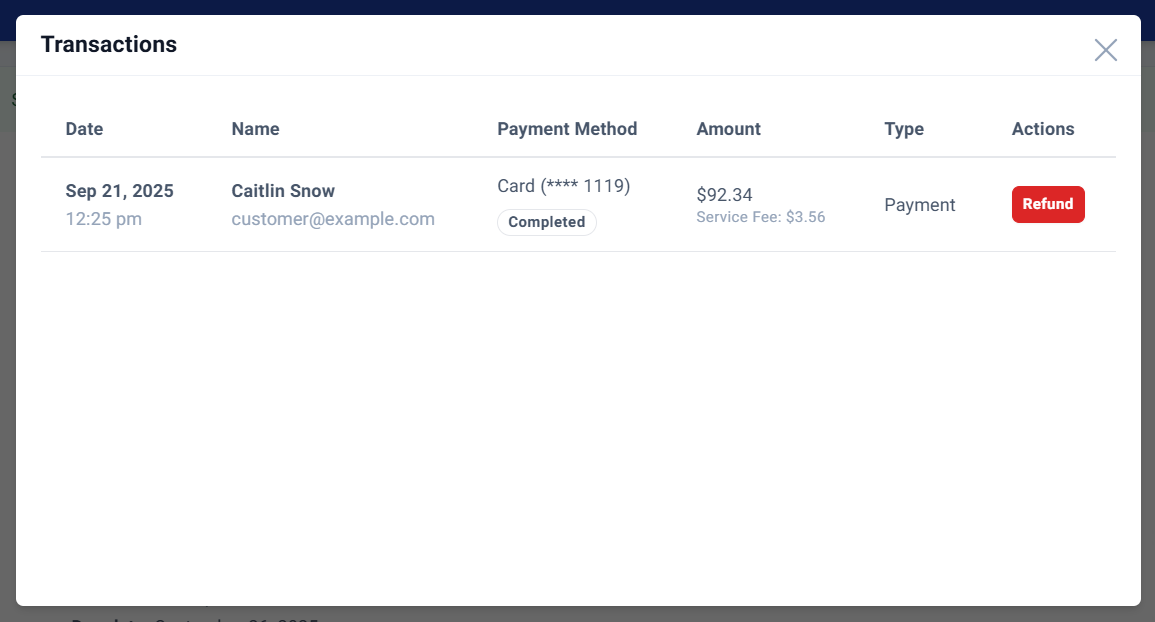
- View: This will navigate you to a comprehensive detail panel where you can view all relevant information about that invoice.
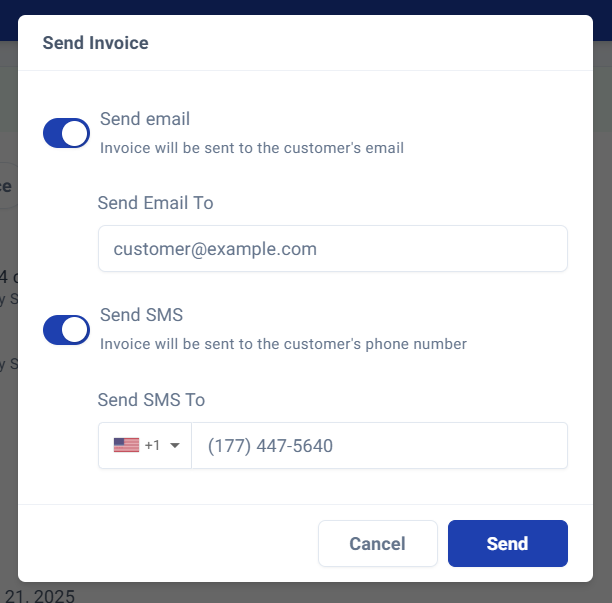
- Send Email: This option opens a comprehensive sharing interface, allowing you to distribute invoices through Email.
- Send SMS: This option opens a comprehensive sharing interface, allowing you to distribute invoices through SMS.
- Edit: This option activates multiple editable fields for quick updates and corrections.
Invoice Details.
Step 4: Accesing to Your Invoice Details.
To access the details of the invoice, click directly on the title of the invoice you want to view.
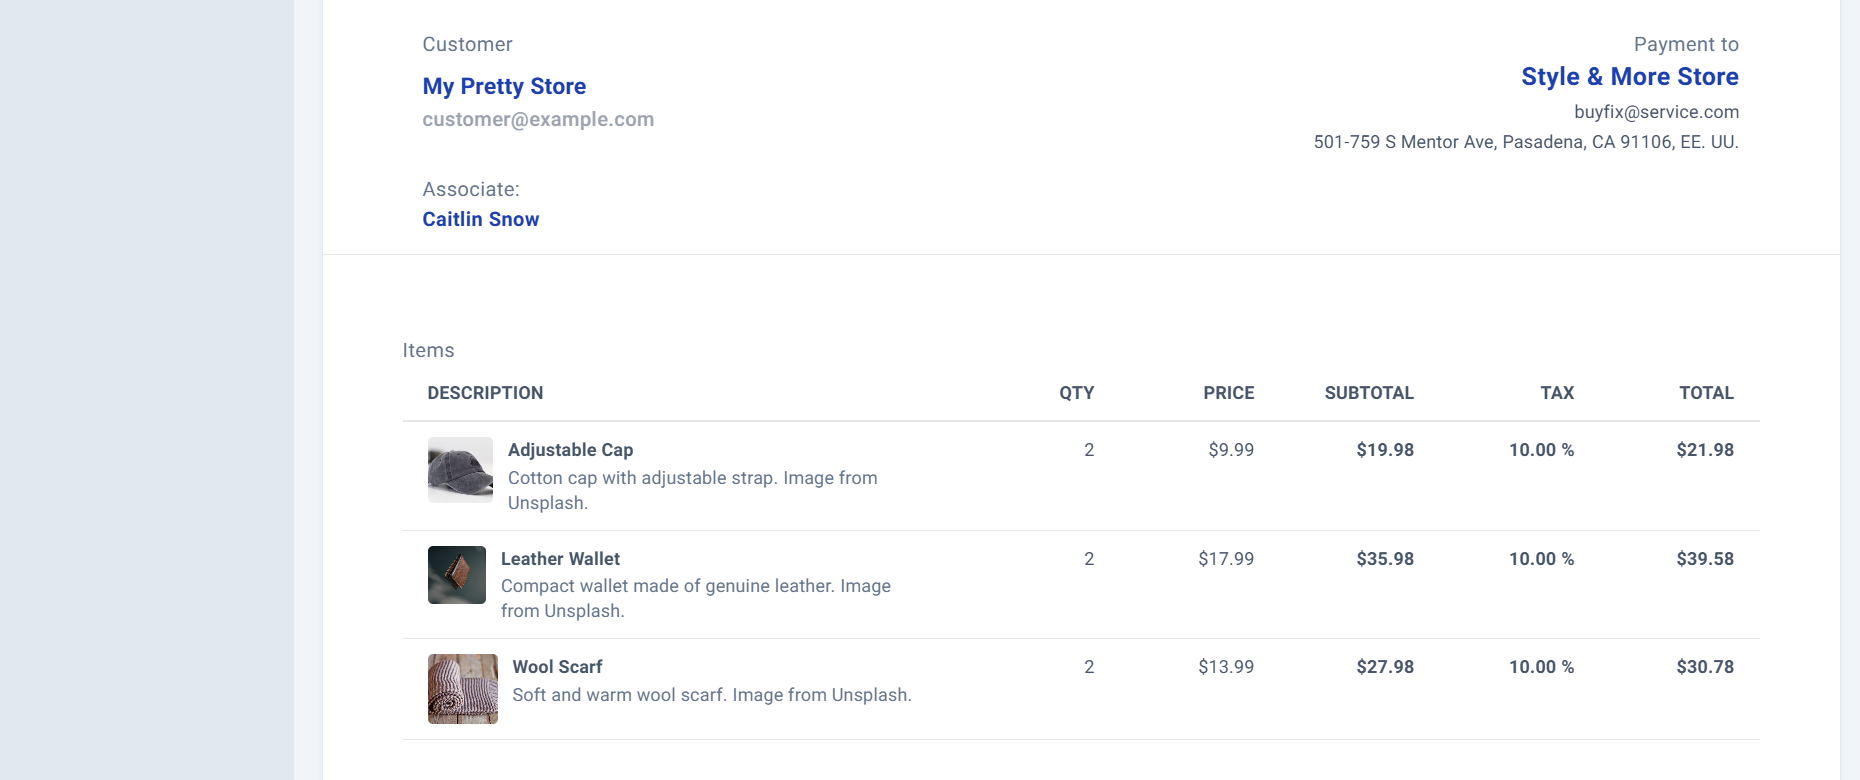
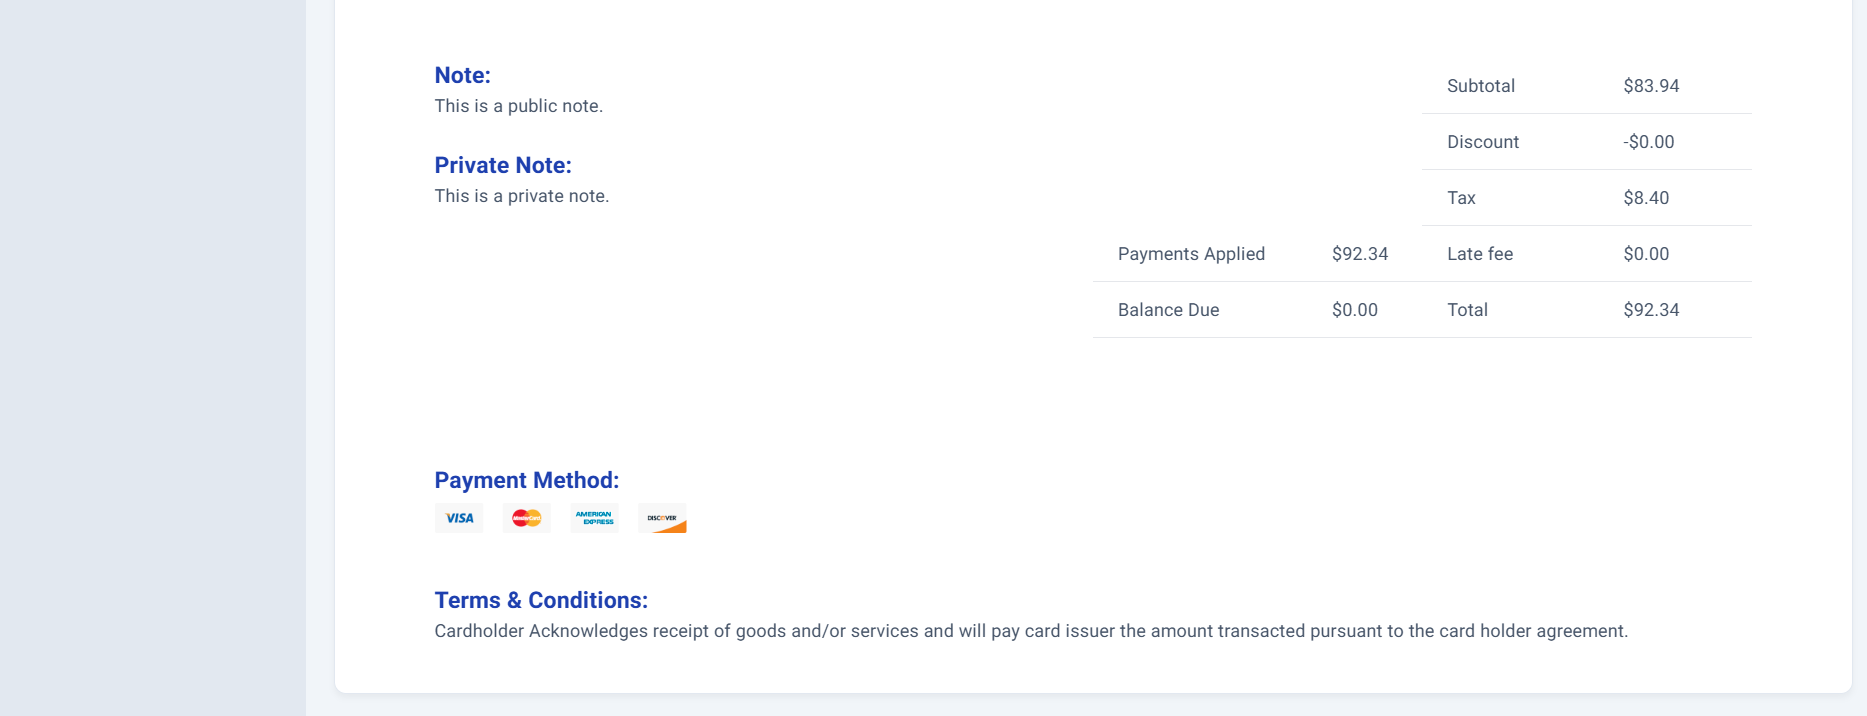
This will navigate you to a comprehensive detail panel where you can view all relevant information about that invoice.
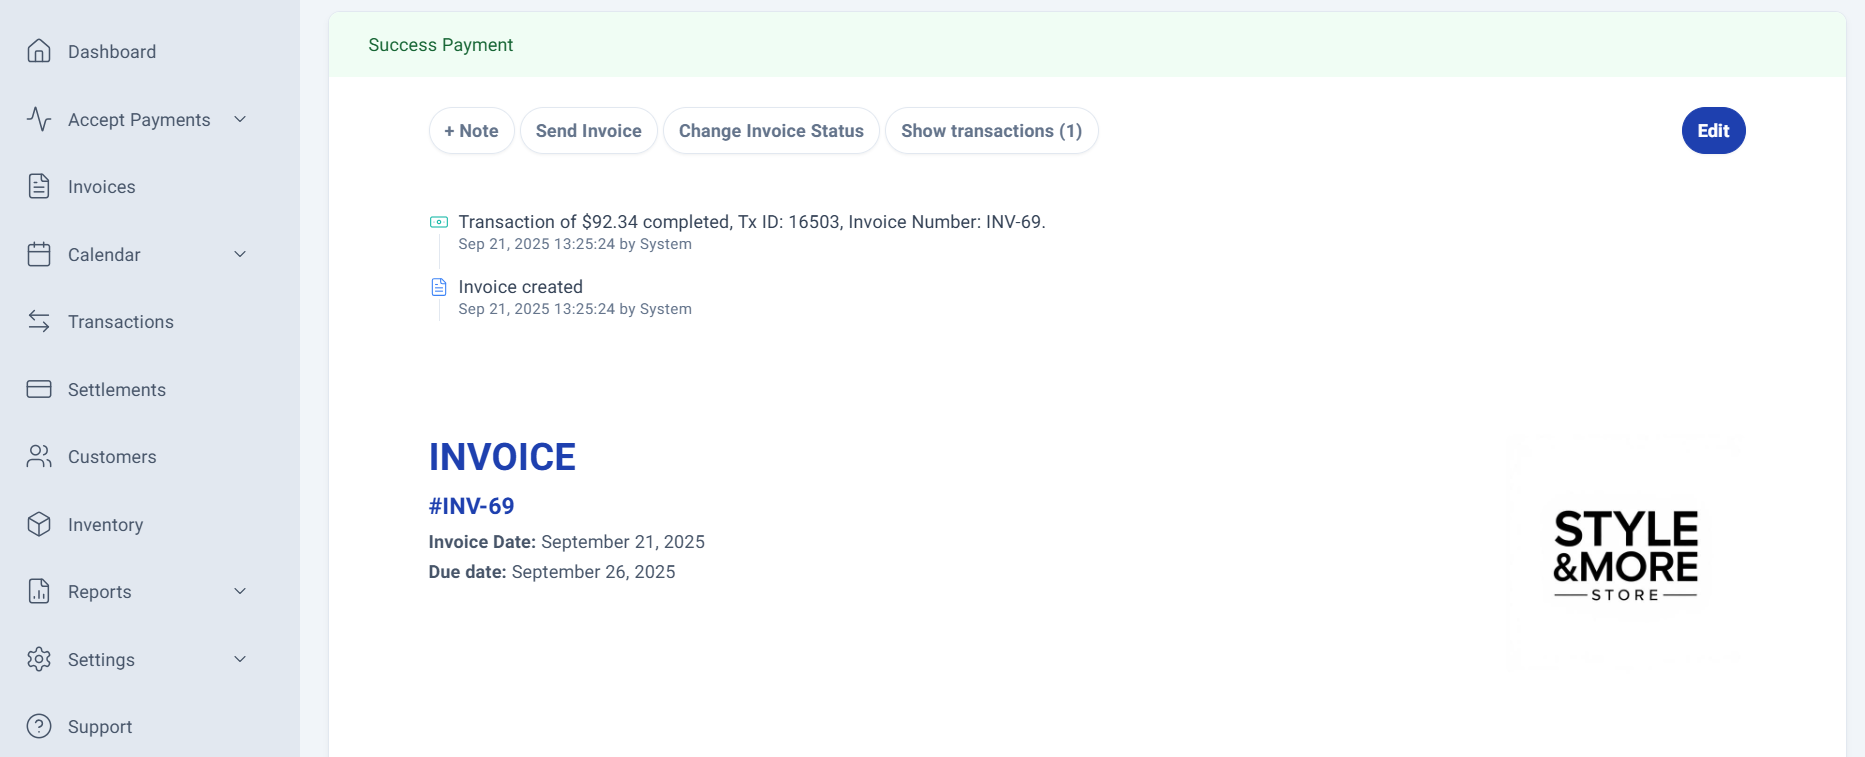
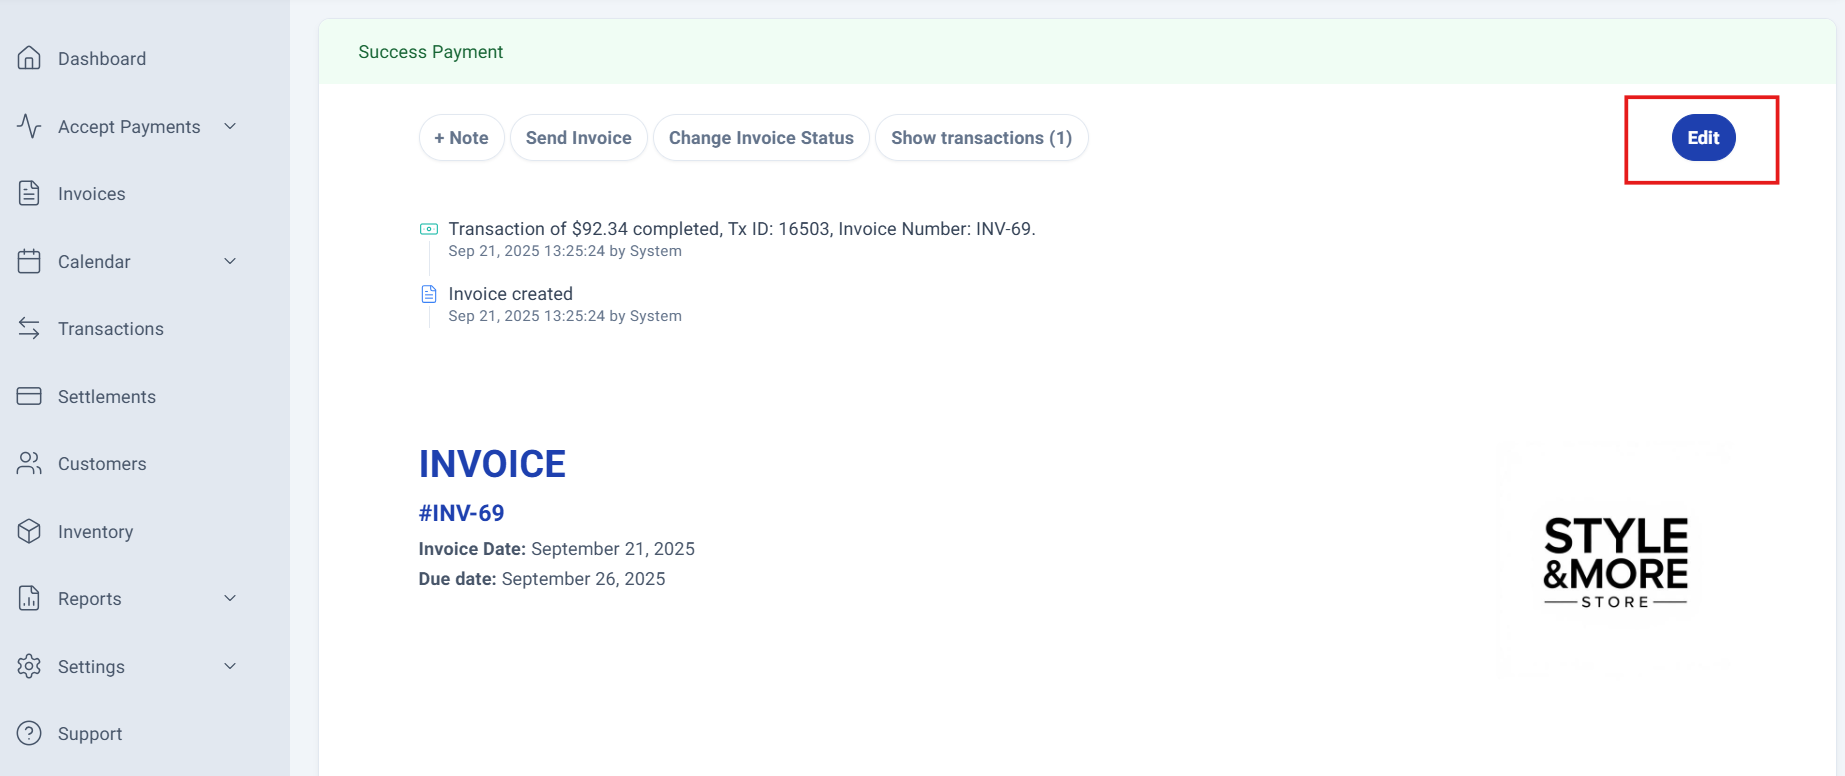
The invoice status is prominently displayed at the top of the invoice details panel for instant visibility.
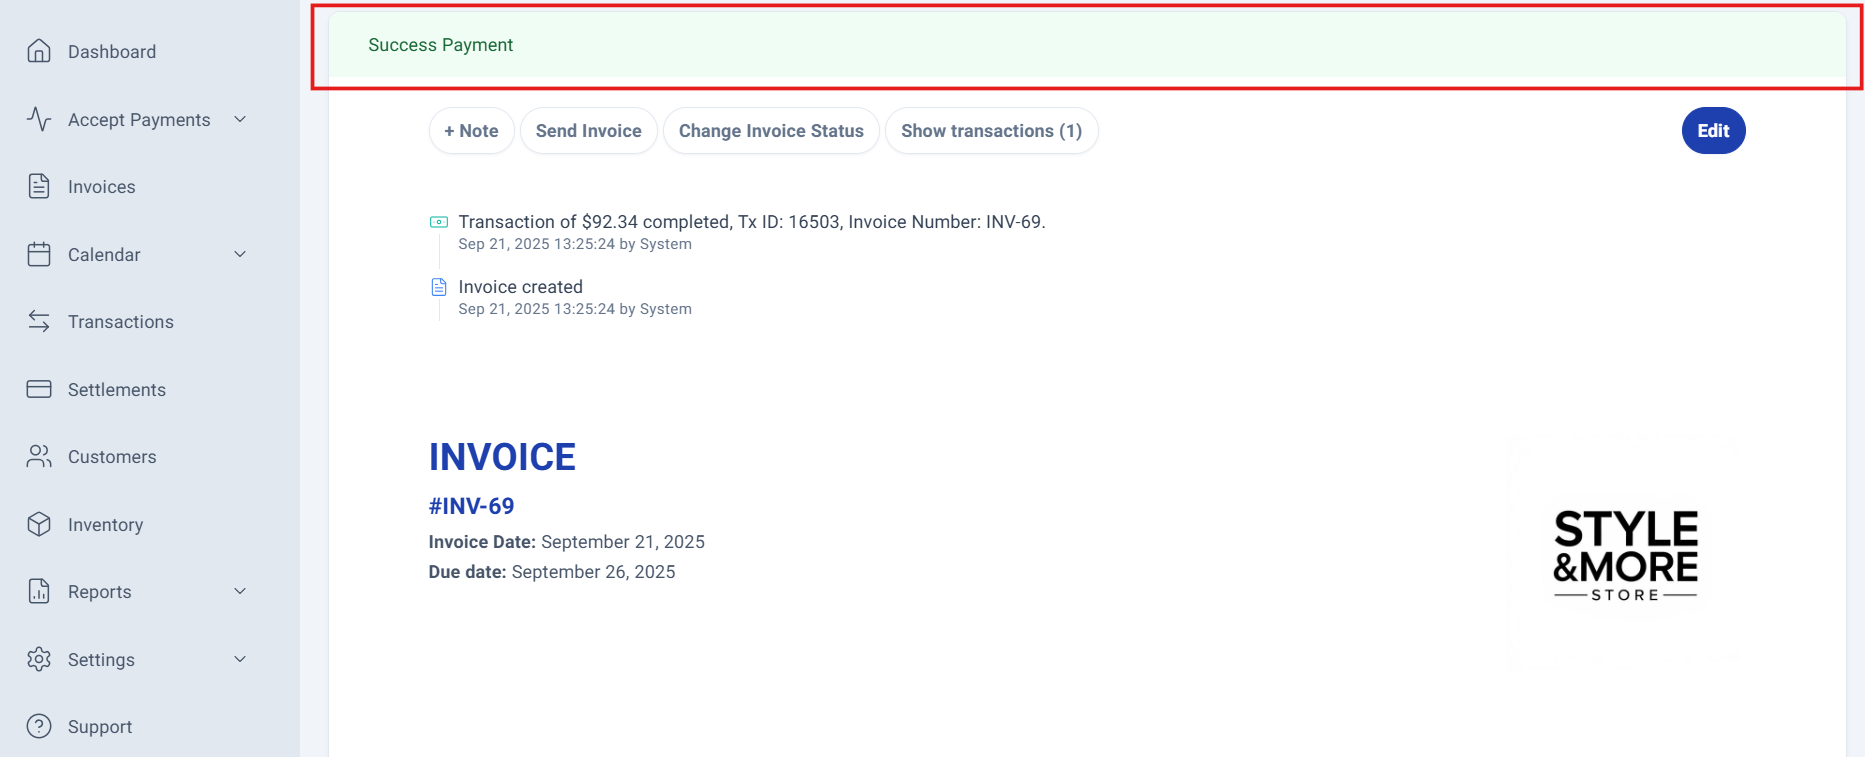
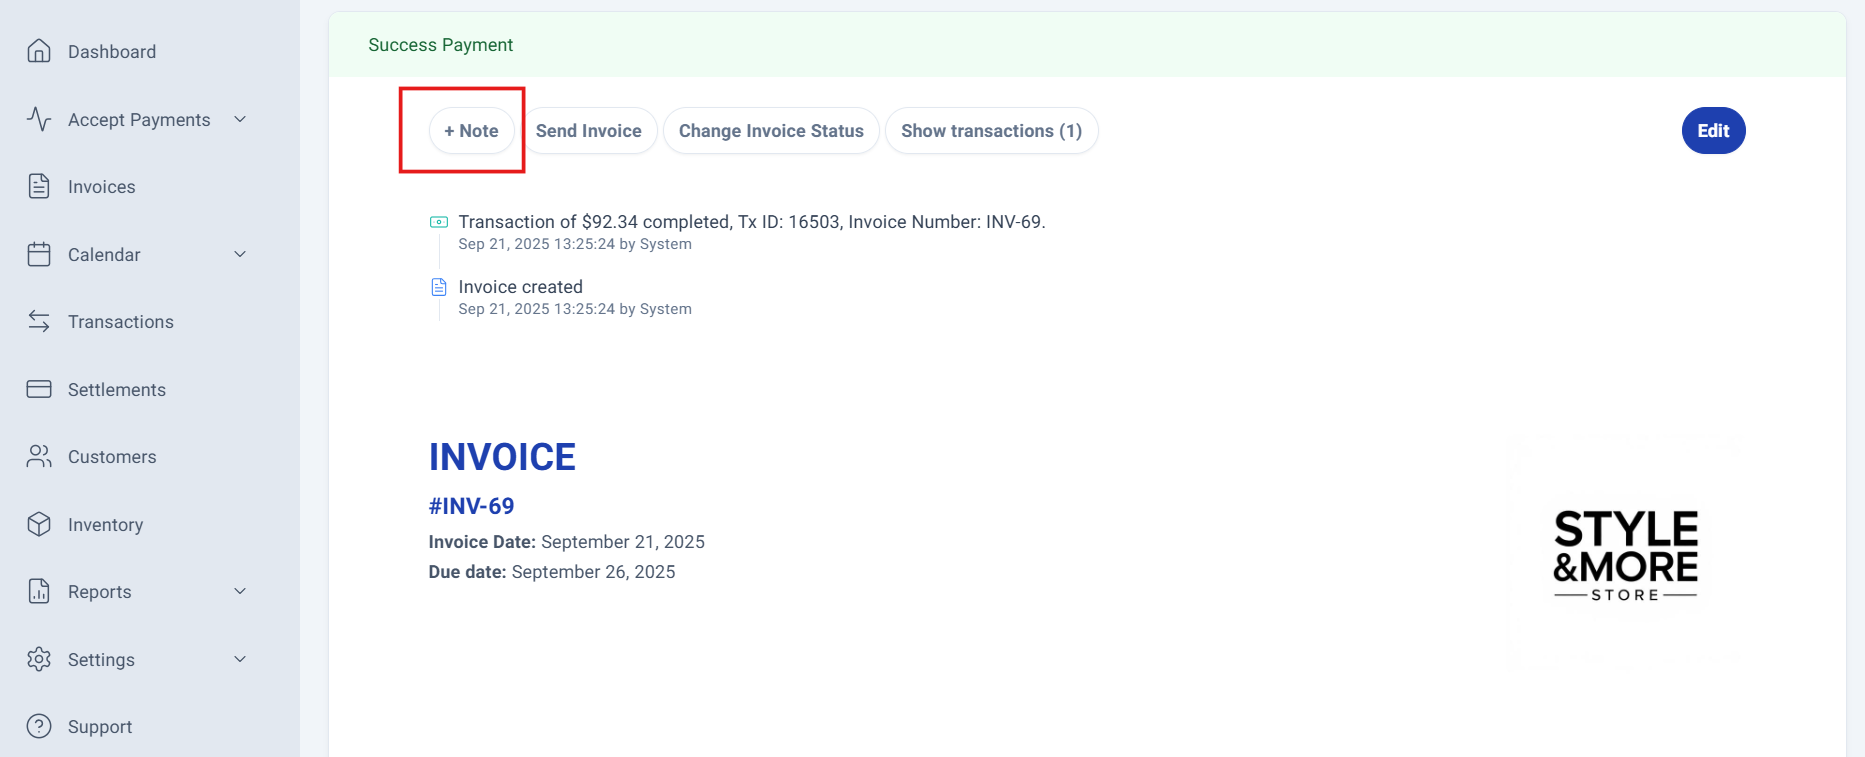
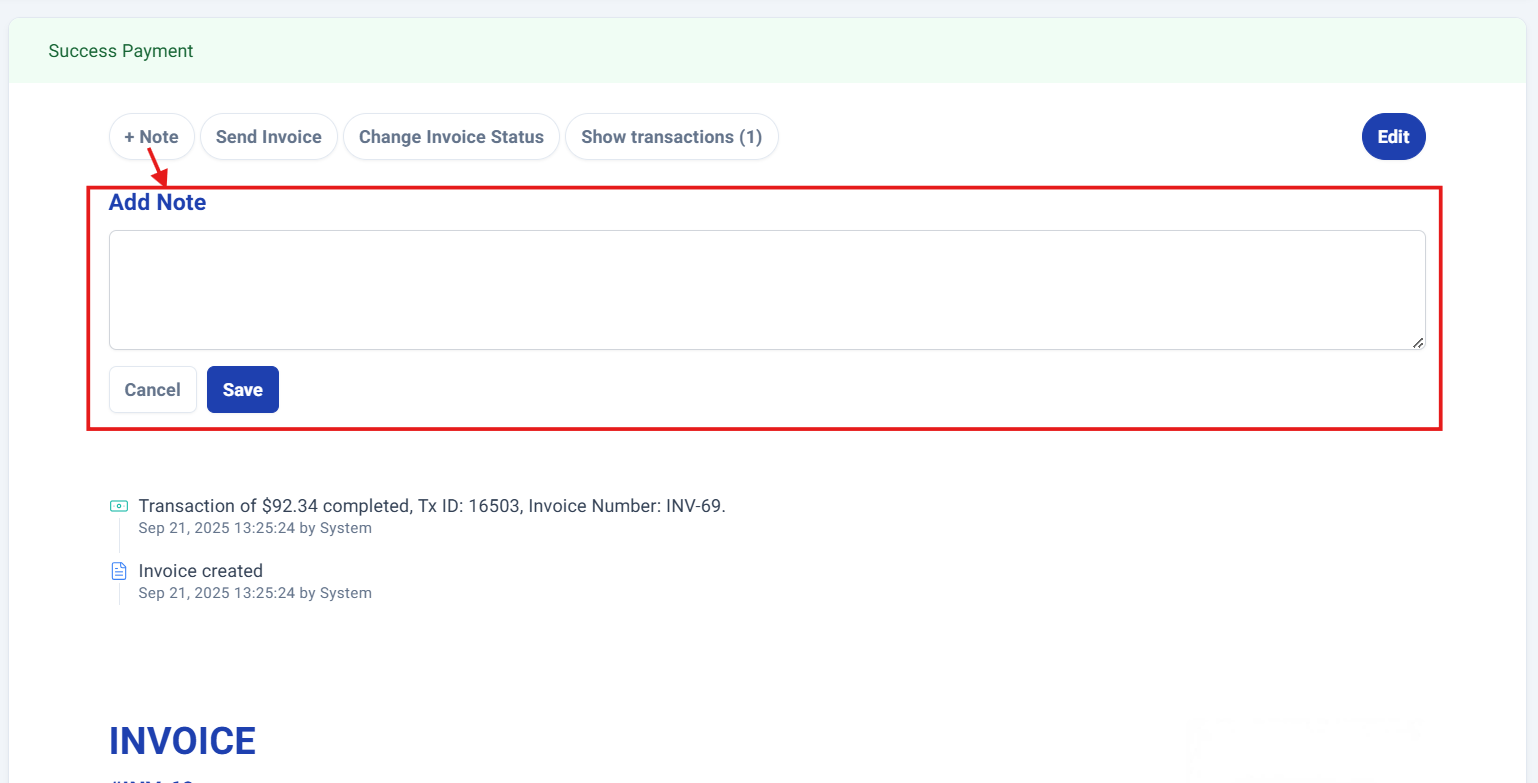
Click the +Note button to instantly open a text box where you can add your note and choose to save or cancel your entry.
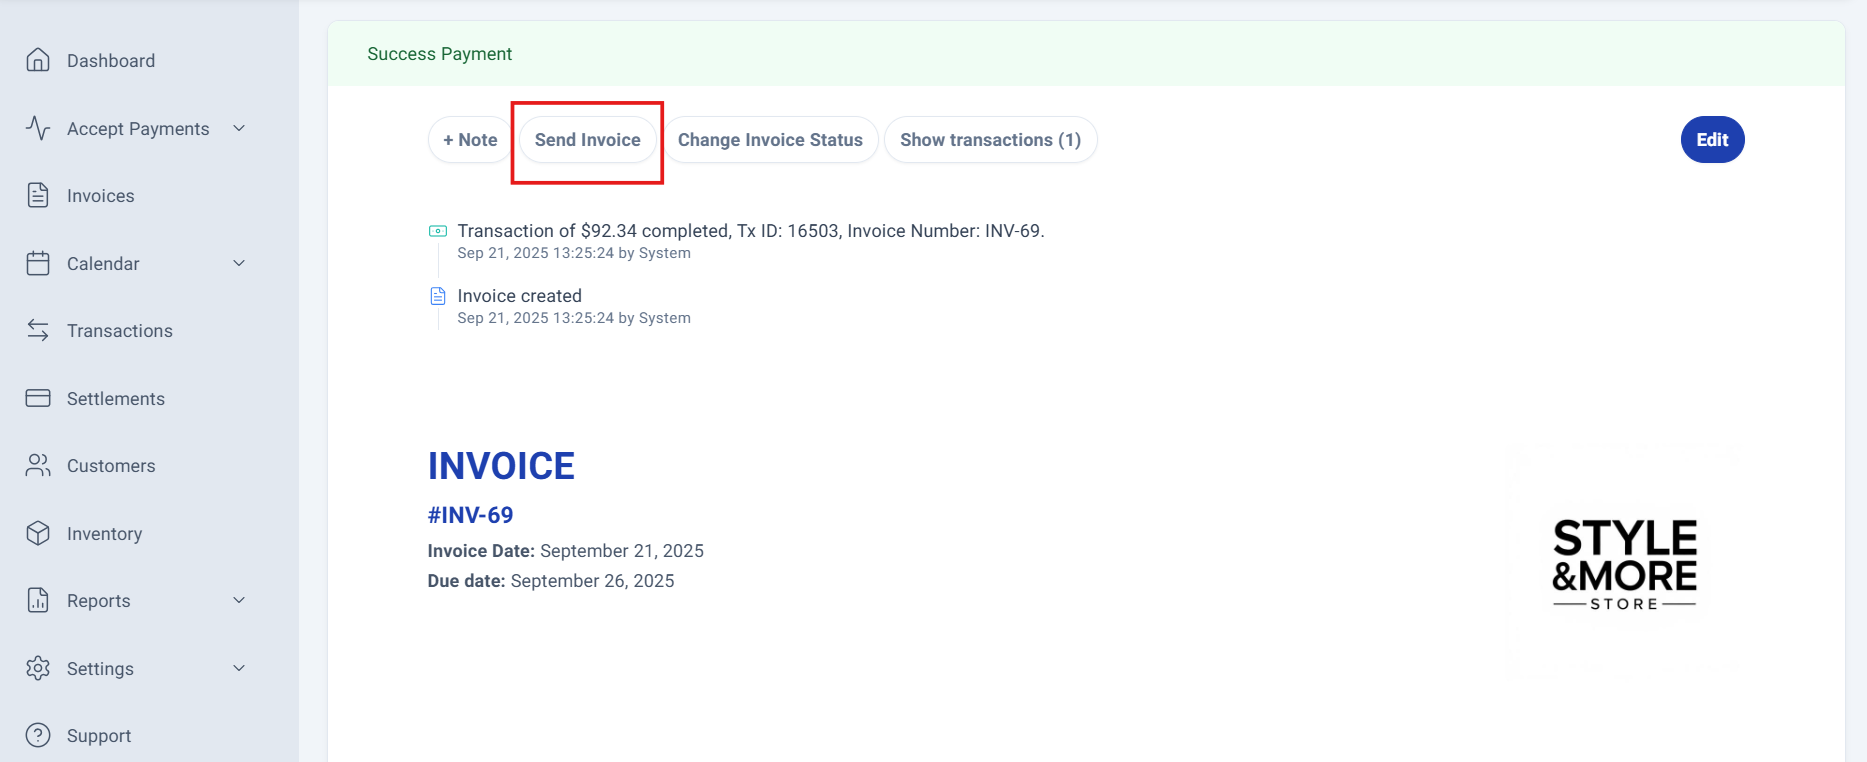
The Send Invoice button opens a comprehensive sharing interface, allowing you to distribute invoices through multiple channels: email and SMS.
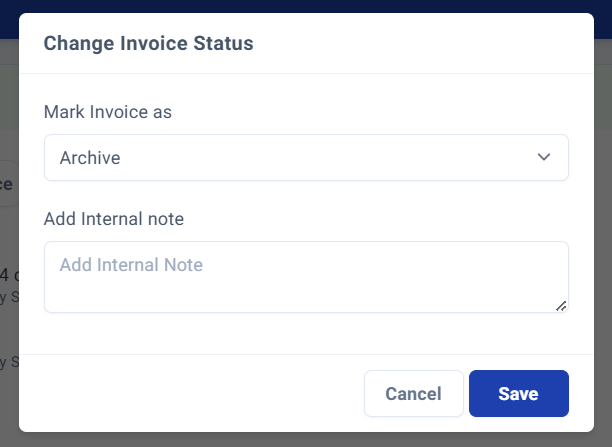
The Change Invoice Status button provides a dedicated window to update the invoice status and add internal notes for complete record-keeping.
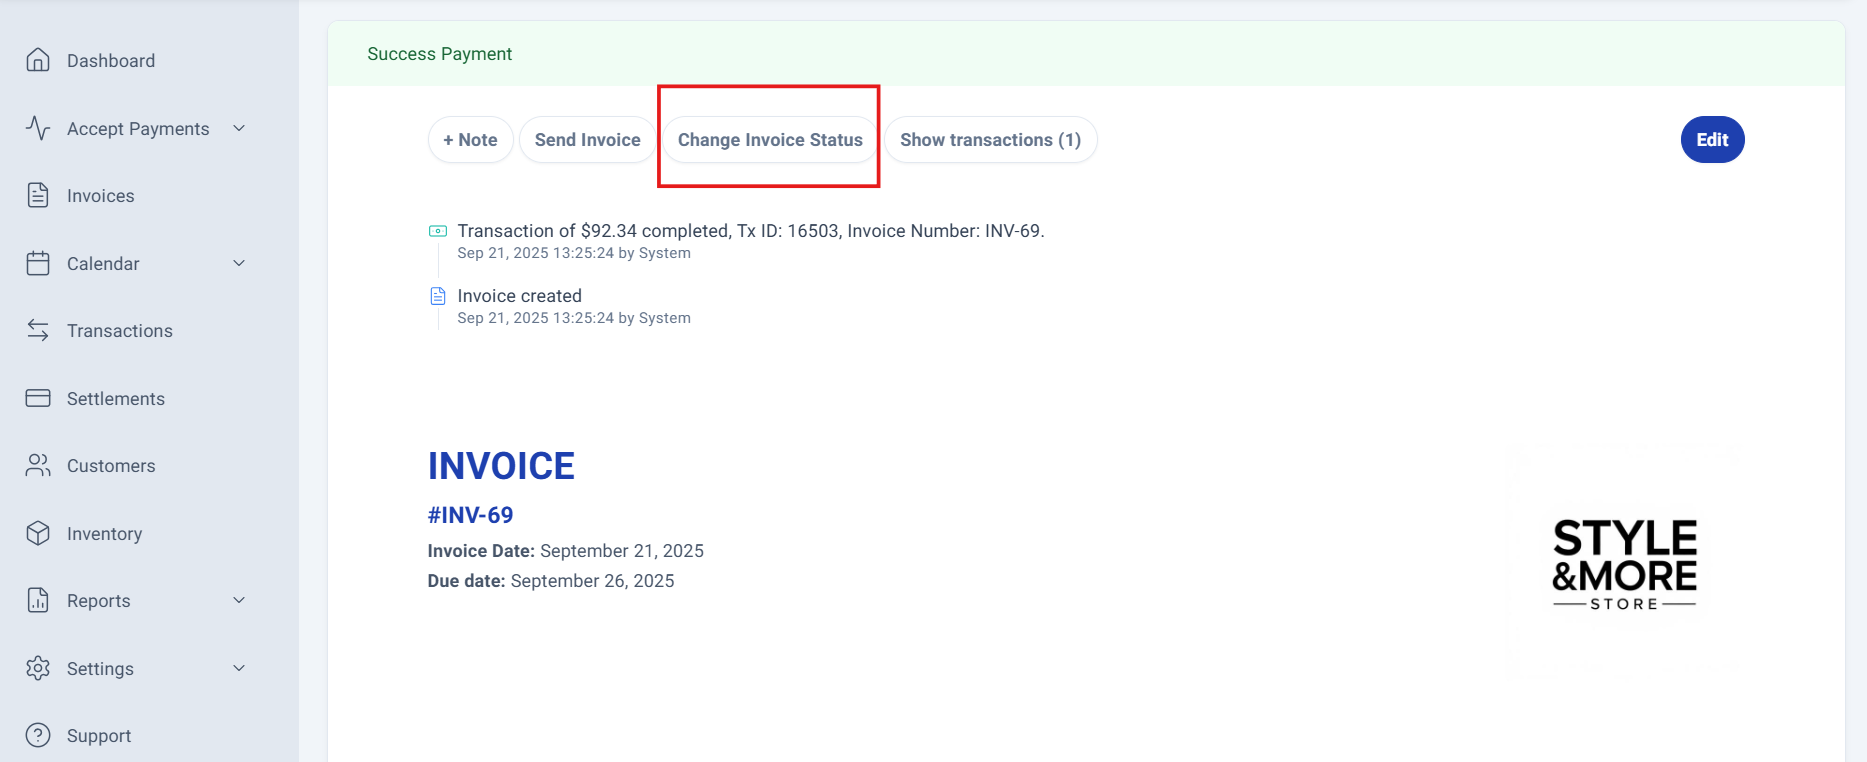
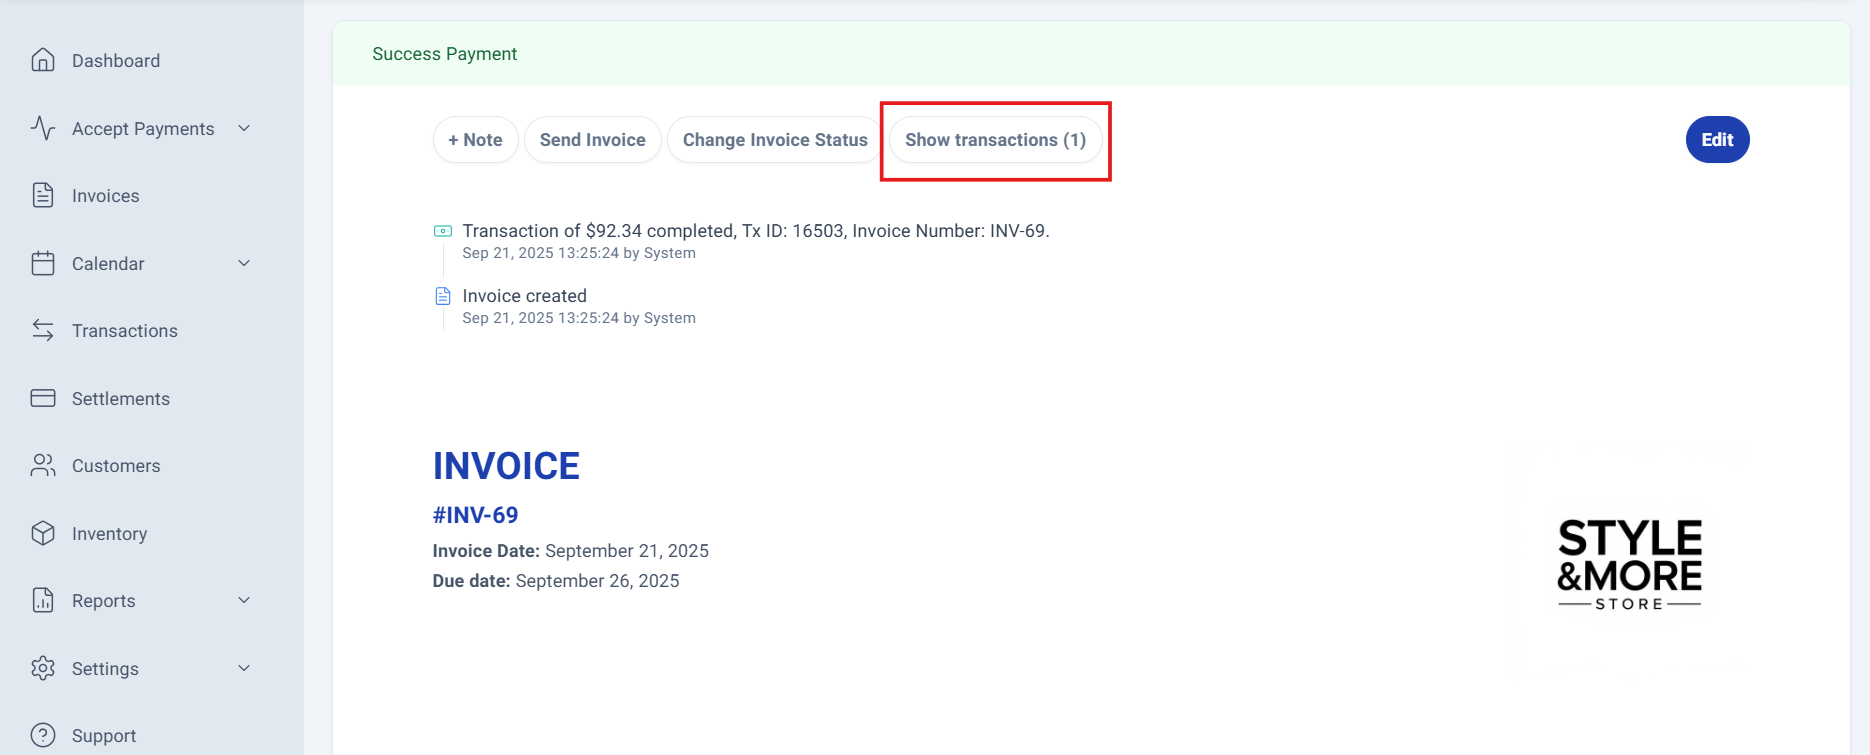
The Show Transactions option displays a detailed window with comprehensive information about all transactions associated with that invoice.
On the right side at the same level, you'll find the Edit button, which activates multiple editable fields for quick updates and corrections. If you need help updating an invoice, click here!
Process Complete!
You have successfully accesing your invoice details and options. The invoices will be tracked in your SimplaTask dashboard.
Was this article helpful?
That’s Great!
Thank you for your feedback
Sorry! We couldn't be helpful
Thank you for your feedback
Feedback sent
We appreciate your effort and will try to fix the article